

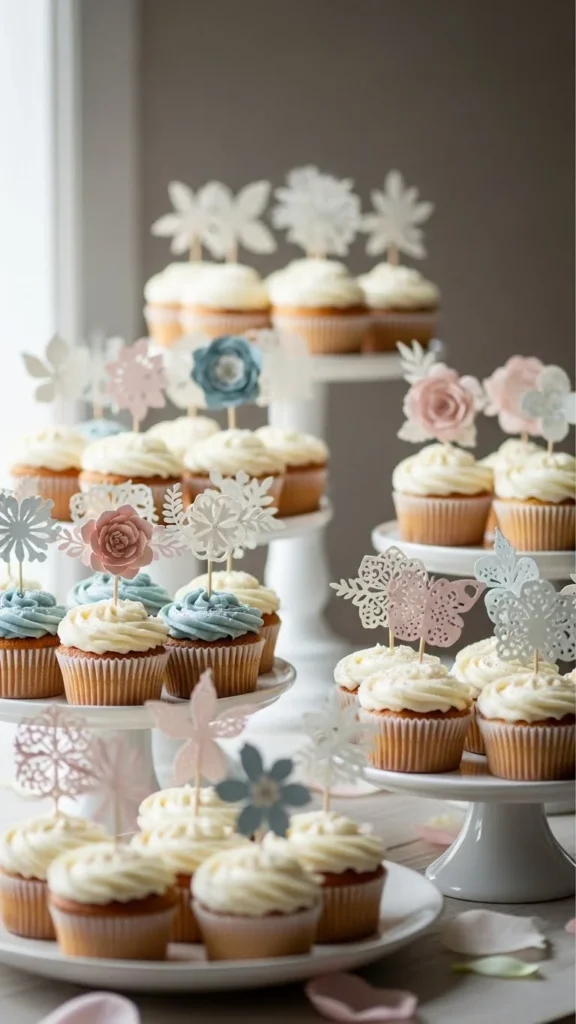
Cupcakes are already crowd-pleasers, but the right topper can turn them into wow moments. Whether you’re planning a birthday, baby shower, holiday party, or just want your dessert table to look extra special, homemade cupcake toppers are the easiest upgrade you can make. They’re affordable, customizable, and surprisingly fun to create.
In this guide, you’ll learn how to make cupcake toppers that look polished and intentional—no fancy tools required. Let’s break it down step by step.
Choose a Theme That Matches Your Event
Before cutting paper or grabbing glue, decide on a clear theme. This keeps your toppers cohesive and helps them blend seamlessly into your dessert table.
Ask yourself:
- What’s the occasion? (birthday, shower, holiday, brunch)
- What colors dominate the table décor?
- Is the vibe playful, elegant, minimal, or whimsical?
Popular topper themes include:
- Simple shapes (circles, stars, hearts)
- Florals and greenery
- Letters or numbers
- Seasonal icons (snowflakes, pumpkins, flowers)
Once you choose a theme, everything else becomes easier—from materials to design choices.
Gather Simple Supplies You Already Have
You don’t need a craft room full of tools. Most cupcake toppers can be made with basic supplies.
Common materials:
- Cardstock or thick paper
- Wooden skewers or toothpicks
- Scissors
- Glue stick or double-sided tape
- Markers or pens
- Optional extras: glitter paper, stickers, ribbon, pressed flowers
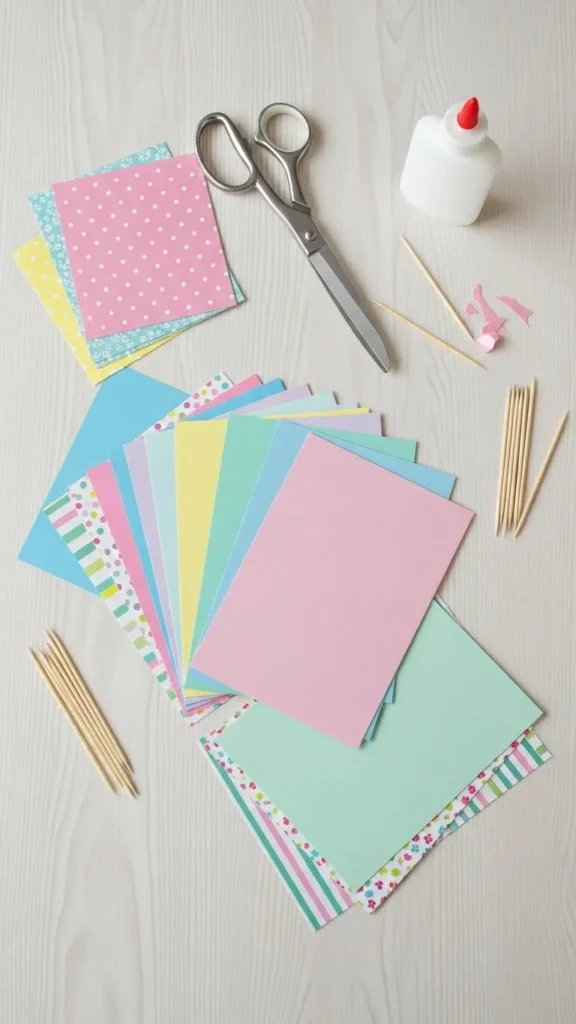
Tip: Thicker paper holds its shape better and won’t droop into frosting.
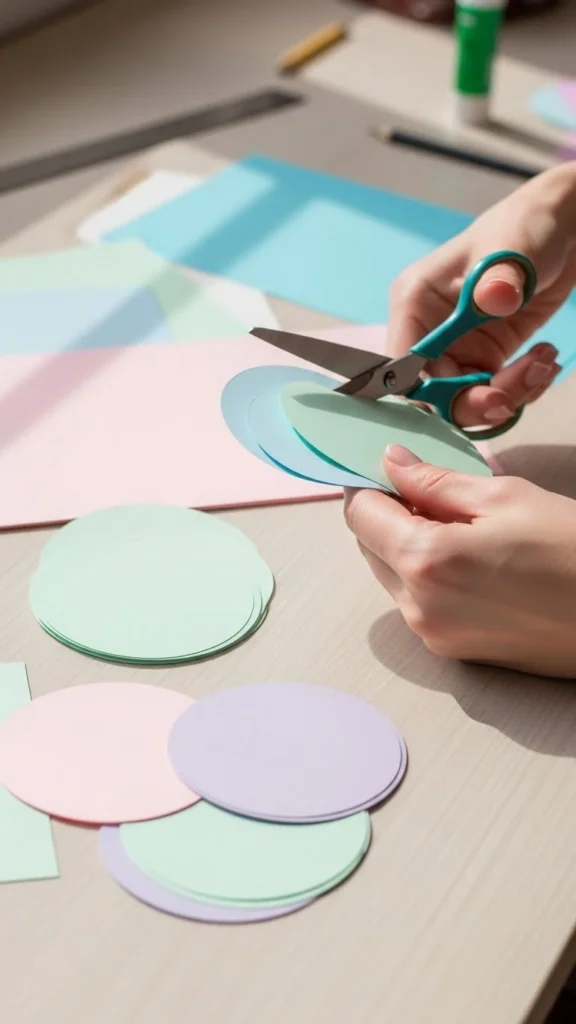
Cut and Create Your Topper Designs
This is where the fun starts. Keep shapes simple for a clean, modern look—or layer elements for a more detailed style.
Easy topper ideas:
- Circles with scalloped edges
- Mini flags or banners
- Silhouettes (butterflies, stars, leaves)
- Initials or numbers cut from cardstock
Helpful tips:
- Trace around a jar lid for perfect circles
- Cut multiple shapes at once by stacking paper
- Stick to one or two colors to avoid a cluttered look
If you’re short on time, even plain circles with neat edges can look stunning when styled well.
Assemble Toppers Neatly and Securely
Assembly is simple, but neatness makes a big difference.
Steps:
- Flip your paper shape face down.
- Apply glue or tape to the back.
- Place a skewer or toothpick vertically.
- Press firmly and let dry for a few minutes.
For extra polish:
- Sandwich the stick between two identical shapes
- Trim uneven edges after gluing
- Keep sticks centered so toppers stand straight
Let everything dry fully before placing into cupcakes to avoid slipping.
Add Texture for a Boutique Look
Flat toppers are lovely, but texture takes them to the next level.
Ideas to elevate your toppers:
- Layer smaller shapes on top of larger ones
- Use glitter or metallic paper sparingly
- Add tiny bows or paper flowers
- Attach pressed flowers for an organic feel
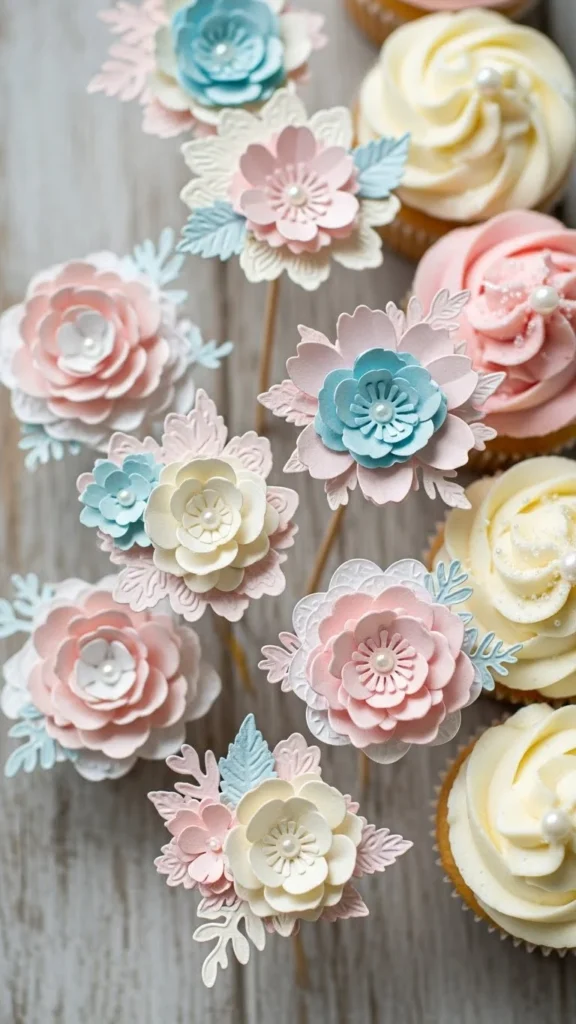
Remember: less is more. One special detail is better than many competing ones.
Match Toppers to Cupcake Frosting Styles
Your toppers should complement the cupcakes—not overpower them.
Pairing tips:
- Tall swirled frosting → simple, clean toppers
- Smooth frosting → detailed or layered toppers
- Neutral frosting → colorful toppers
- Bold frosting → soft or muted toppers
Also consider height. Very tall toppers look great on dessert tables but may feel overwhelming on single-serve displays.
Style the Dessert Table for Maximum Impact
Once toppers are in place, step back and look at the full table.
Styling tips:
- Arrange cupcakes at varying heights
- Group by color or topper style
- Leave some negative space
- Repeat topper colors elsewhere on the table
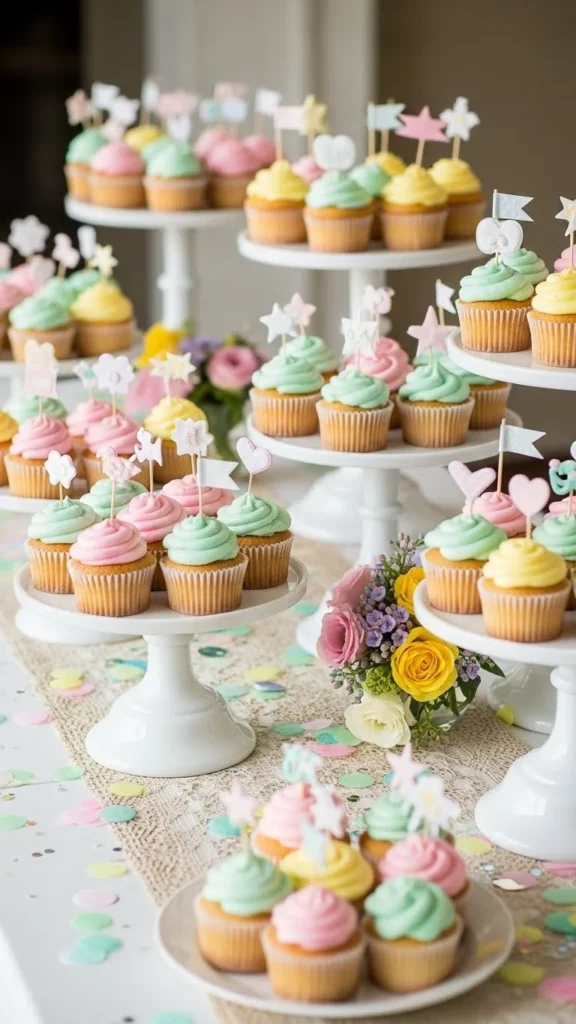
Small details add up fast, and toppers help tie everything together visually.
Final Thoughts
Cupcake toppers are one of the easiest ways to make desserts feel thoughtful and event-ready. With simple materials and a clear theme, you can create designs that look custom and intentional—without spending much time or money.
Once you try making your own, you’ll start spotting ideas everywhere. Save this guide, gather your supplies, and start crafting toppers that truly upgrade your dessert tables.

Leave a Reply