

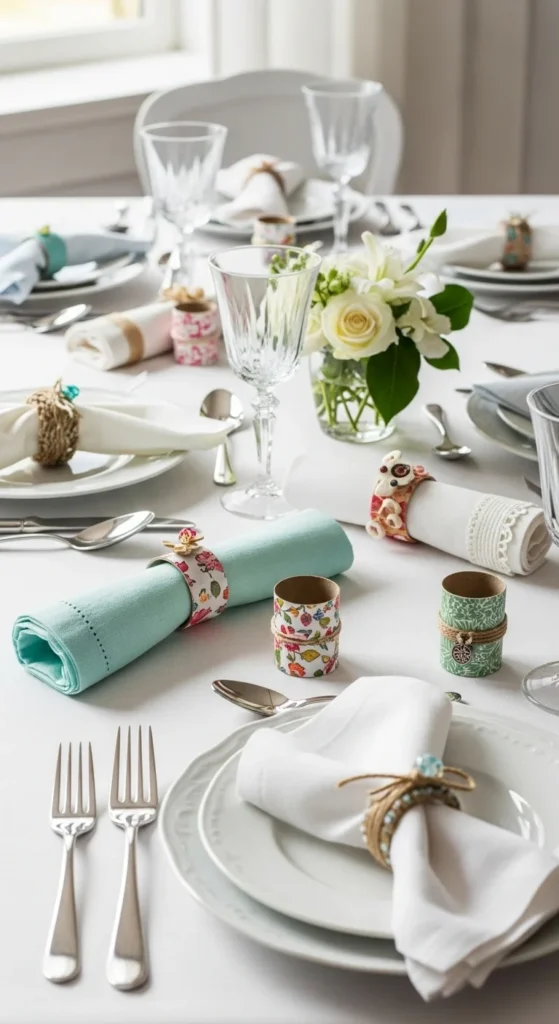
Napkin rings are small details that quietly shape how a table feels. They frame each place setting and pull the whole setup together without taking over the scene. DIY napkin rings are especially popular because they let you work with items you already have and adjust colors, textures, and finishes to match any gathering. From casual dinners to seasonal tables, these ideas focus on simple builds, low-cost supplies, and easy steps that anyone can follow.
1. Twine-Wrapped Wooden Rings
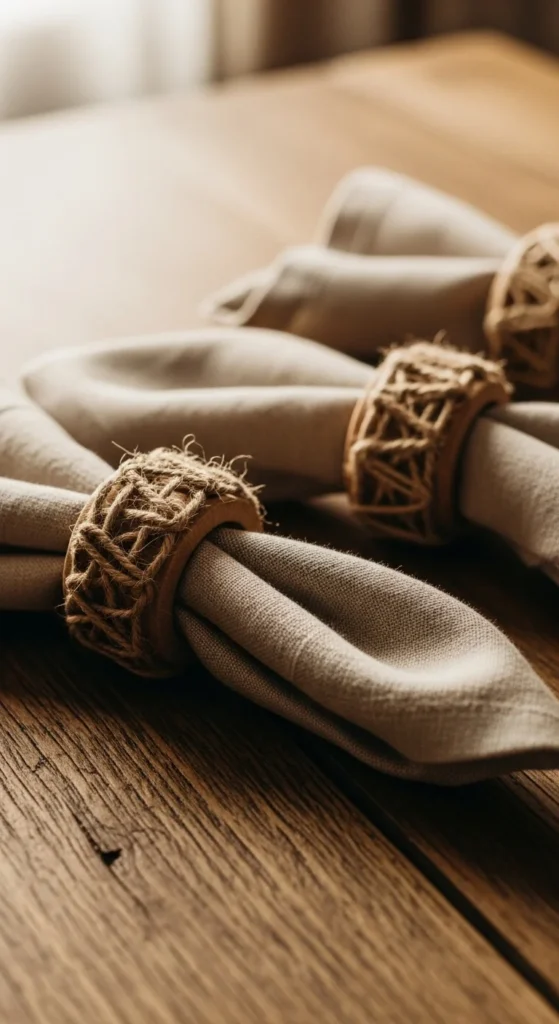
Twine-wrapped wooden rings are simple to make and fit almost any table style. Start with unfinished wooden rings from a craft store or cut sections from a wooden dowel. Wrap jute or cotton twine tightly around the ring, securing the ends with a small dab of craft glue on the inside. This style works well for everyday meals, outdoor tables, or relaxed family gatherings.
For variety, mix natural twine with thin white string or soft gray cord. Keep the wrap neat for a clean look, or let it overlap slightly for texture. If you want a subtle accent, tuck a small dried leaf or herb stem under the final wrap before gluing. These rings pair well with neutral napkins and wood or ceramic tableware.
Cost stays low since twine is inexpensive and one roll goes far. If you already have spare rope, string, or packaging twine, this project costs almost nothing. Store them in a small box between uses, and they will hold up well over time.
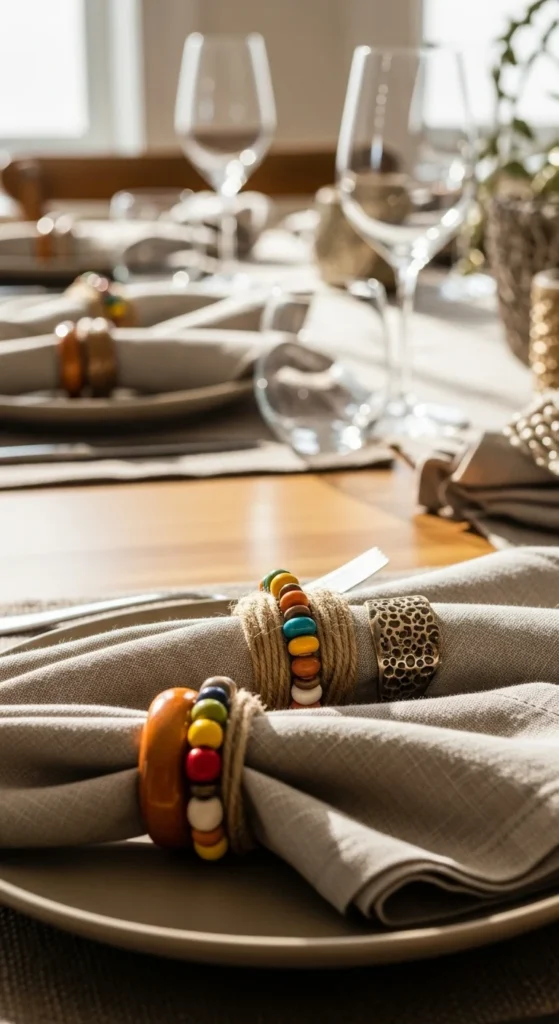
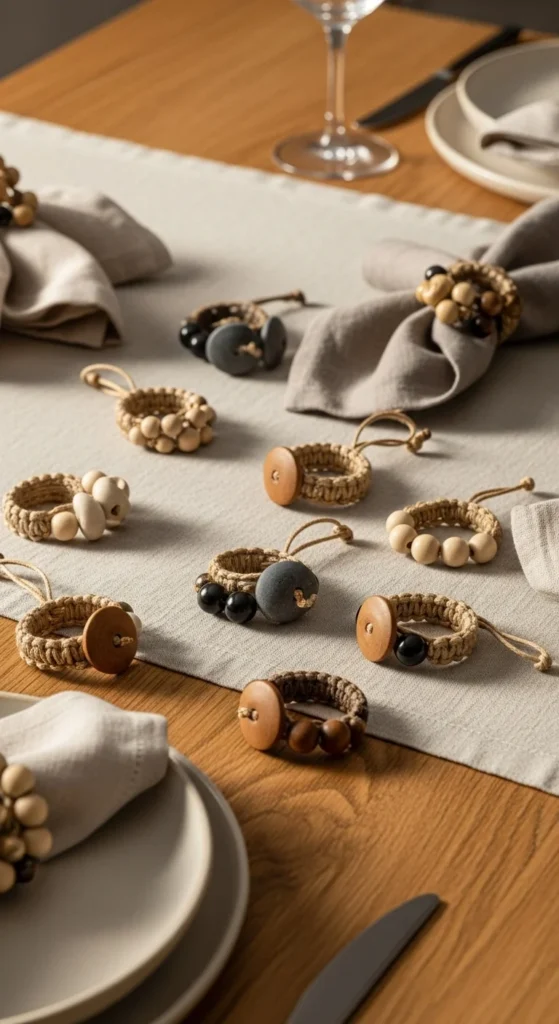
2. Beaded Napkin Rings With Elastic Cord
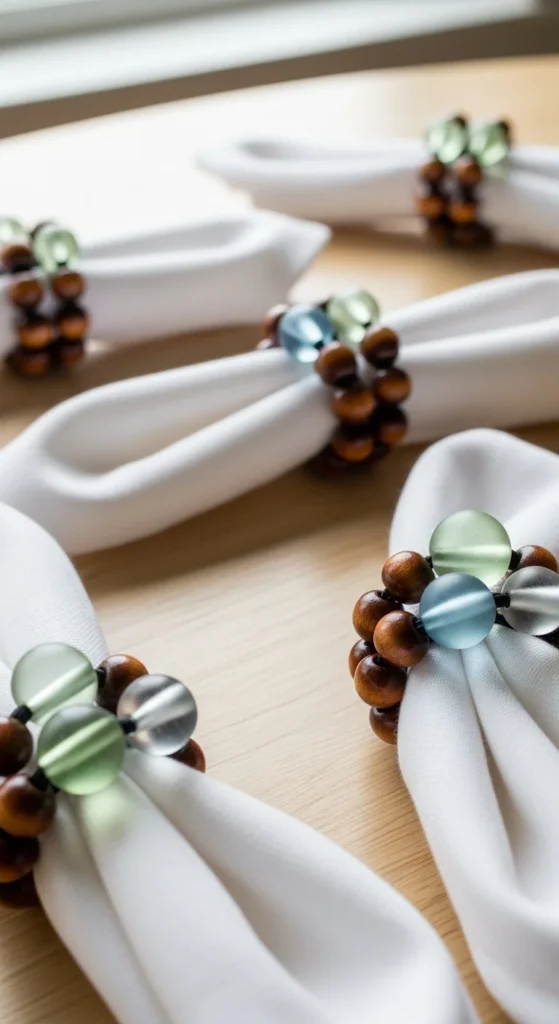
Beaded napkin rings add color and shape without much effort. Use wooden beads, acrylic beads, or glass beads left over from other crafts. Thread them onto elastic cord, size the loop to fit a rolled napkin, and tie a tight knot. Hide the knot inside a bead for a tidy finish.
This project is easy to customize. Choose a single color for a calm table or mix several shades for playful contrast. Wooden beads can be left plain or lightly painted with craft paint. Let them dry fully before stringing. If elastic cord is not available, thin jewelry wire works too, though elastic makes placement easier.
These rings are lightweight and flexible, which helps them fit napkins of different thicknesses. Budget-wise, bead packs are affordable, and you can make many rings from one set. Keep extra beads on hand so you can replace or adjust designs later without starting over.
3. Leather Strip Napkin Holders
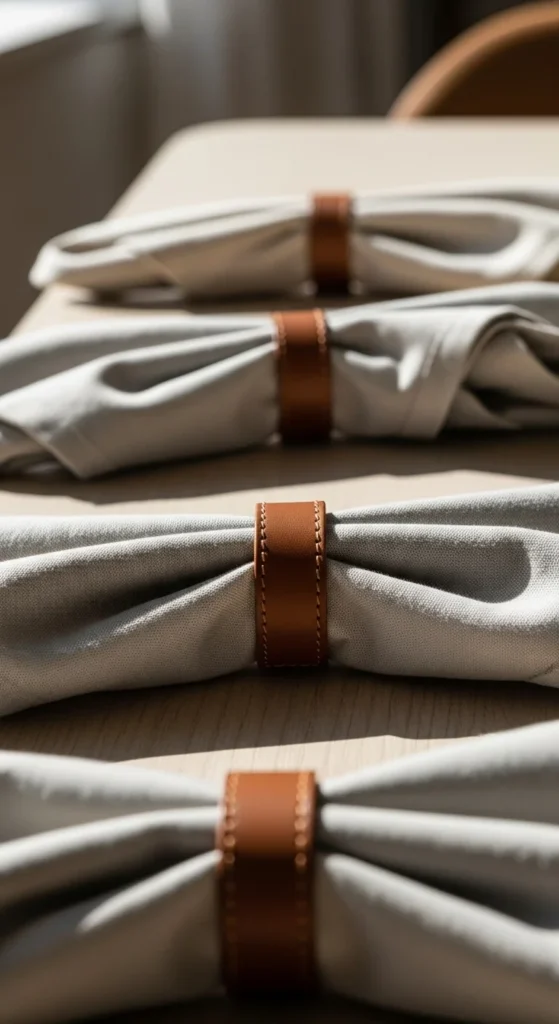
Leather strip napkin holders feel simple and modern. Cut thin strips from faux leather sheets or recycled belts. Wrap each strip around a napkin and secure the ends with a small rivet, snap, or strong craft glue. The result is clean and understated.
Faux leather keeps this project affordable and easy to work with. Many sheets can be cut with scissors, and small scraps go a long way. Stick to neutral shades like tan, black, or gray for a flexible look that works year-round.
If you want a softer feel, sand the edges lightly to remove sharp corners. These holders store flat, which saves space. They suit both casual and dressed-up tables and work well with simple plates and linens. One sheet of faux leather can produce a full set with leftovers for future projects.
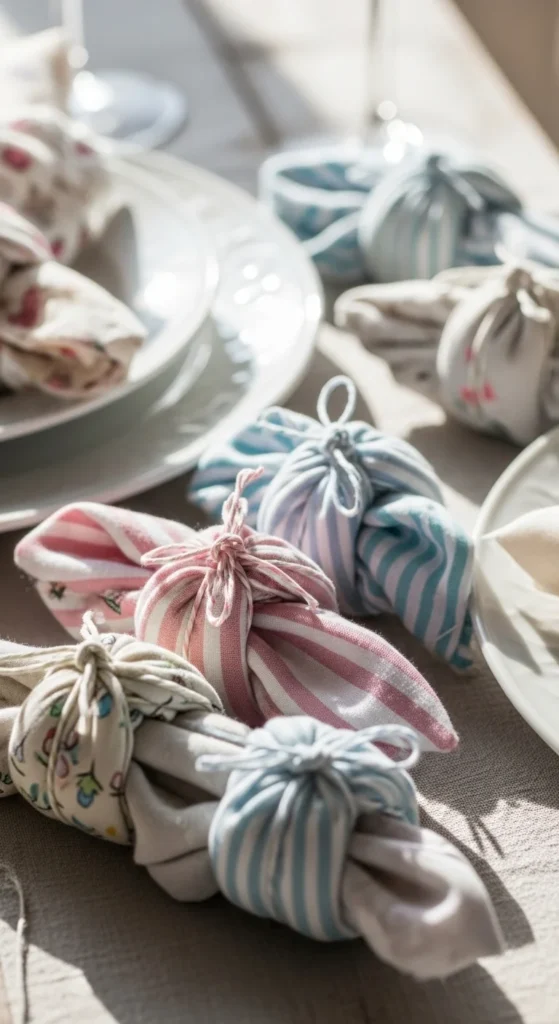
4. Ribbon-Tied Napkin Rings
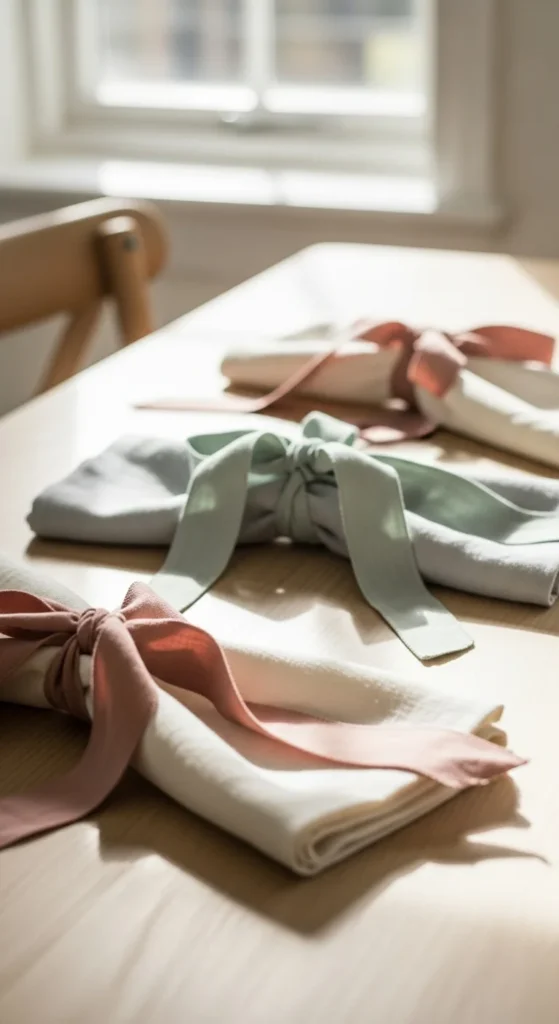
Ribbon-tied napkin rings are quick and flexible. Cut fabric ribbon into long strips and tie each around a folded napkin. Choose cotton, linen, or grosgrain ribbon for structure. A simple knot or bow keeps the look relaxed.
This idea works well for themed tables since ribbons come in endless colors and patterns. Swap ribbons for different seasons or events without making new rings. You can also use fabric strips cut from old shirts or tablecloths to keep costs low.
To keep ribbons neat, trim the ends at an angle or fold them under. Store them rolled to avoid wrinkles. This style suits both small gatherings and large tables since it scales easily and takes very little time to prepare.
5. Metal Washer Napkin Rings
Metal washer napkin rings offer a clean, industrial feel. Use large hardware washers and clean them thoroughly. Slip a rolled napkin through the center opening. For a softer look, wrap a bit of twine or thin cord around part of the washer.
This project costs very little since washers are inexpensive and easy to find. You can leave them raw or paint them with matte spray paint. Let them dry fully before use.
These rings add weight and structure, which helps napkins stay in place. They pair well with simple table settings and neutral colors. Store them in a small container to keep them from scratching other items.
6. Clay Loop Napkin Rings
Clay loop napkin rings let you shape custom forms with minimal tools. Use air-dry clay and roll it into smooth ropes. Bend each rope into a circle and join the ends. Let them dry according to package instructions.
Once dry, sand lightly and paint if desired. Neutral tones work well, but soft pastels can add charm. Seal with a clear finish for durability.
Air-dry clay is affordable and beginner-friendly. One package can make many rings. These add a handmade touch that feels personal and warm. Handle gently during storage to avoid chips.
7. Macramé Knot Napkin Rings
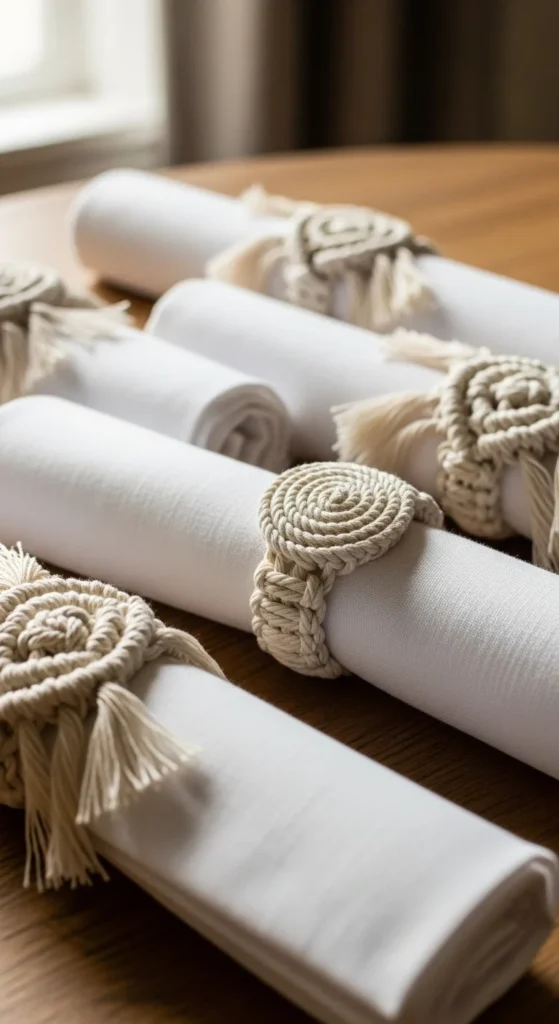
Macramé knot napkin rings bring texture without being heavy. Use cotton cord and learn one or two basic knots. Wrap the knotted section into a loop and secure the ends.
This style works well with neutral tables and natural fabrics. Keep knots consistent for a tidy look. Trim ends evenly.
Cord is inexpensive and forgiving, making this a good project for beginners. Practice with scrap cord before making a full set. These rings store easily and hold their shape.
8. Paper Roll Napkin Rings
Paper roll napkin rings are budget-friendly and quick. Cut cardboard rolls into short sections. Wrap each with decorative paper, fabric, or twine. Secure with glue.
This project is ideal for casual tables or short-term use. Use wrapping paper scraps or magazine pages for variety. Let glue dry fully before slipping napkins through.
They are lightweight and easy to recycle after use. Keep designs simple to avoid tearing. This is a good option when you need many rings fast.
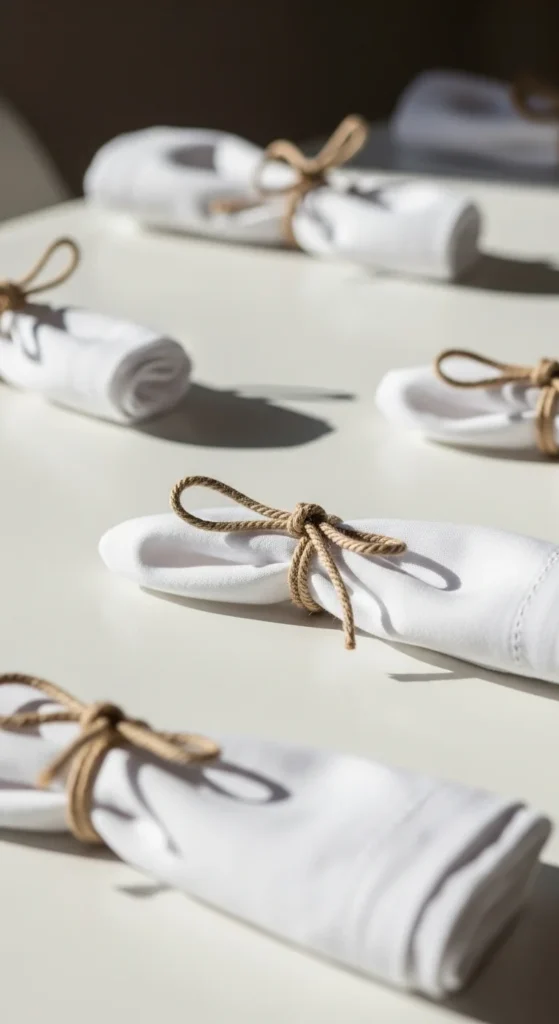
9. Rope Loop Napkin Rings
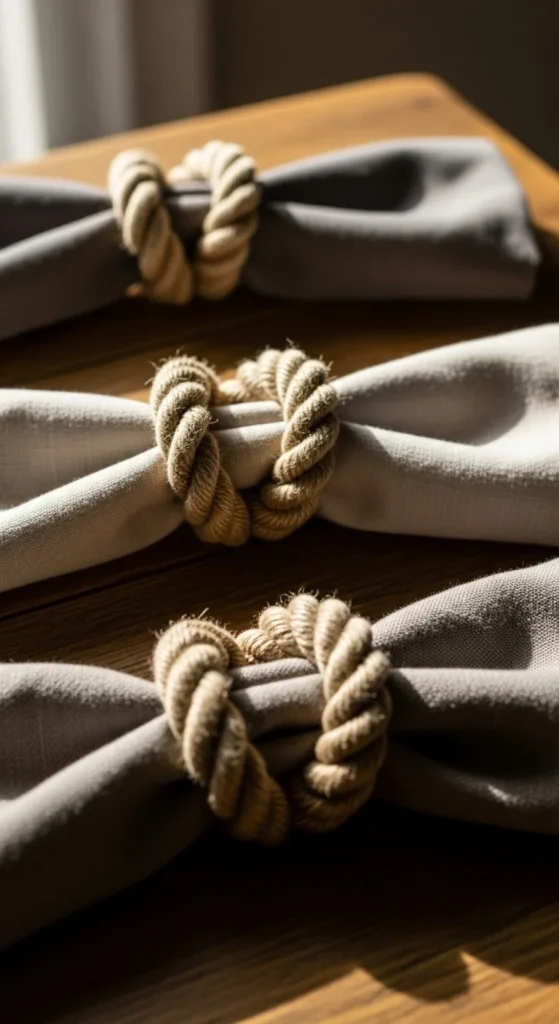
Rope loop napkin rings feel sturdy and relaxed. Cut thick cotton rope into equal lengths. Form each into a loop and secure with glue or a tight wrap of thinner cord.
These rings work well outdoors or with casual meals. Keep rope ends neat by wrapping tightly or sealing with glue.
Rope is affordable and durable. One length can make several rings. Store them in a dry place to keep them clean.
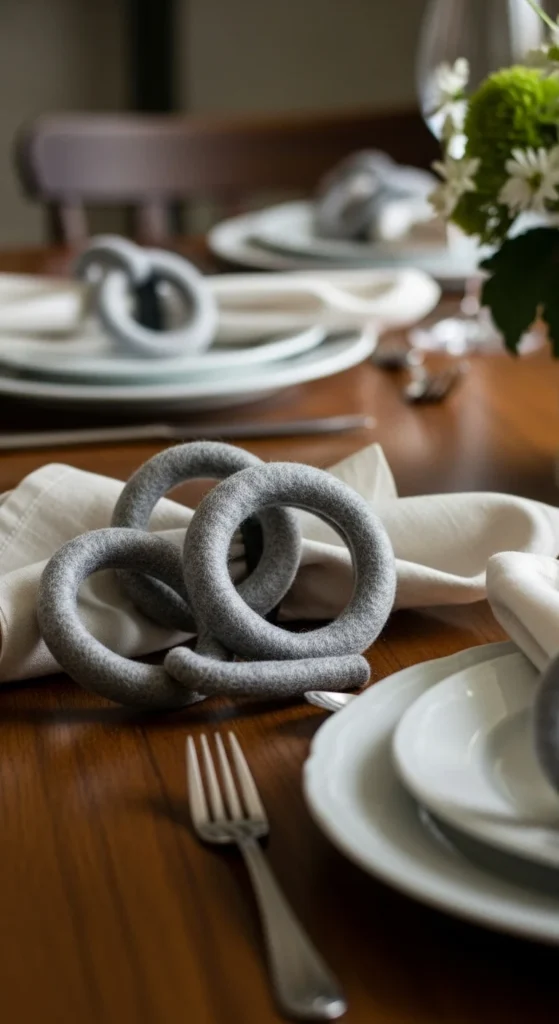
10. Wire-Wrapped Napkin Rings
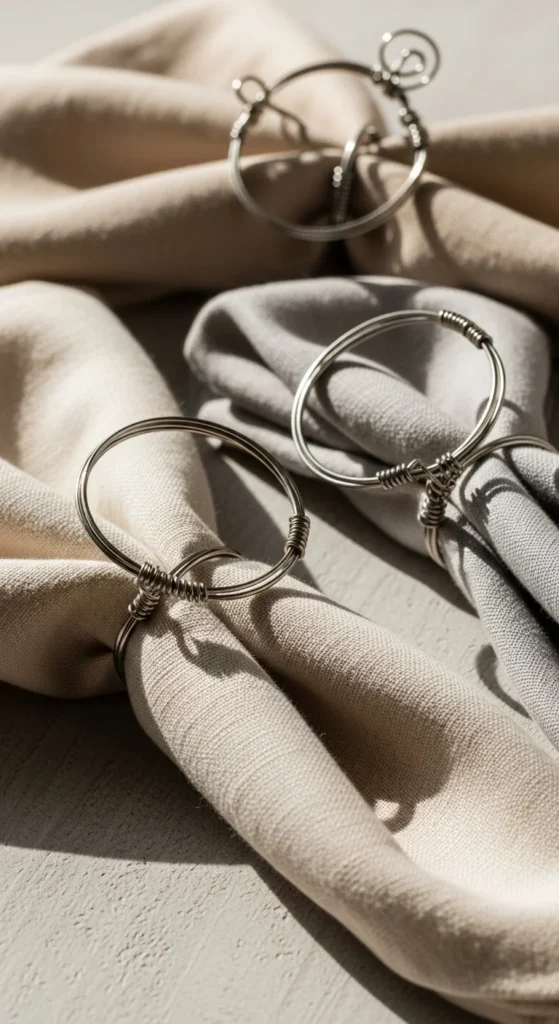
Wire-wrapped napkin rings are clean and modern. Use craft wire and form simple circles around a jar or bottle for even sizing. Twist ends together neatly.
Choose copper, silver, or black wire depending on your table style. Keep designs simple to avoid snagging fabric.
Wire is inexpensive and easy to reshape if needed. These rings stack well for storage and hold their shape over time.
11. Wooden Bead and Cord Rings
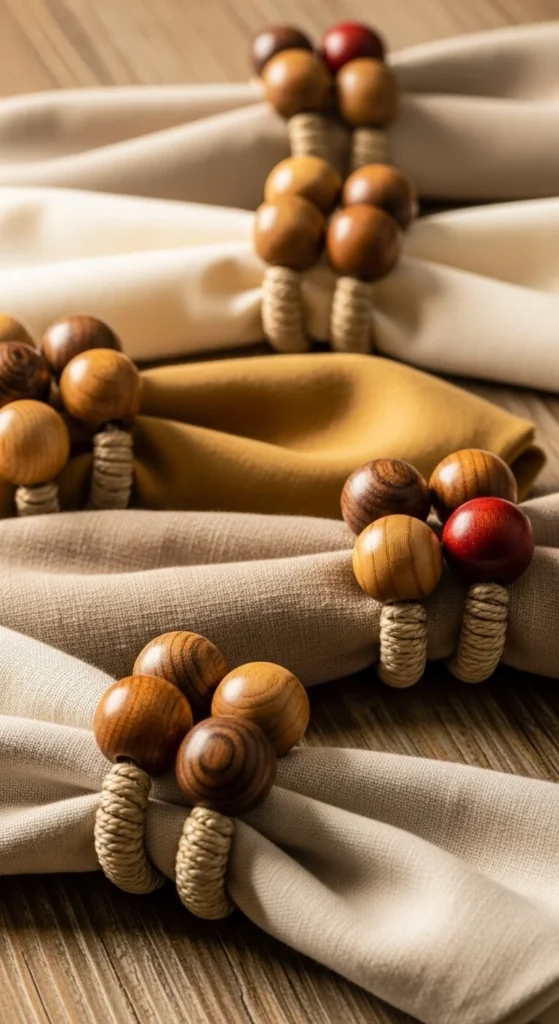
Large wooden beads on cord create a relaxed look. Thread several beads onto sturdy cord and tie into a loop.
Mix bead sizes for interest. Leave beads natural or paint lightly.
This project is low-cost and quick. It works well for everyday meals and casual tables. Extra beads can be saved for future crafts.
12. Fabric Scrap Napkin Rings
Fabric scrap rings use leftover cloth. Cut strips and tie around napkins or sew into loops.
This option reduces waste and adds softness. Mix patterns or stick to one color.
Fabric scraps are often free if you sew. Store folded to avoid wrinkles. Swap fabrics as tables change.
13. Painted Wooden Rings
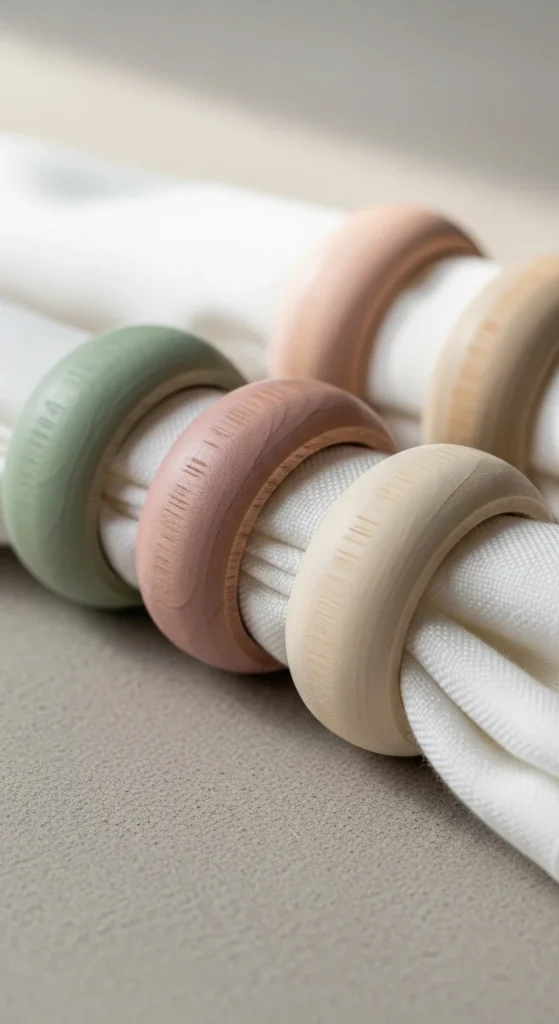
Painted wooden rings are classic. Start with unfinished rings and paint with craft paint.
Use thin coats and let dry fully. Keep colors muted for flexibility.
Wooden rings are inexpensive and reusable. Store carefully to avoid chips.
14. Felt Loop Napkin Rings
Felt loop napkin rings feel soft and simple. Cut felt strips and glue or sew into loops.
Choose neutral shades or seasonal colors. Felt is easy to cut and forgiving.
This project is affordable and safe for beginners. Store flat to keep shape.
15. Button-Decorated Rings
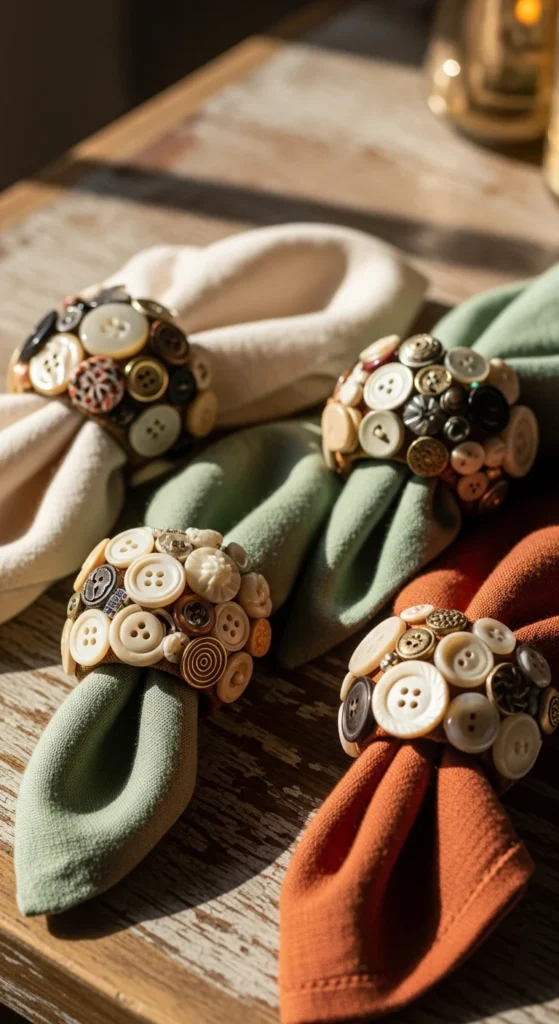
Button-decorated rings add detail. Attach buttons to fabric or ribbon loops.
Use matching or mixed buttons. Keep spacing even.
Buttons are often on hand already. This idea adds character without much work.
16. Natural Branch Slice Rings
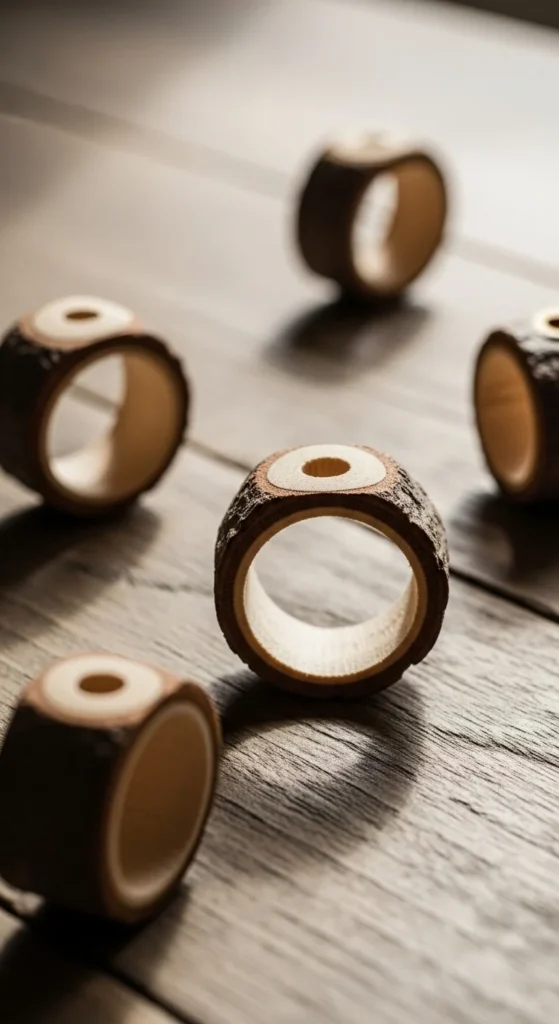
Branch slice rings bring an outdoor feel. Cut thin slices and drill a center hole.
Sand edges smooth. Leave natural or seal lightly.
This project costs little if you have branches. Let wood dry fully before use.
17. Yarn-Wrapped Cardboard Rings
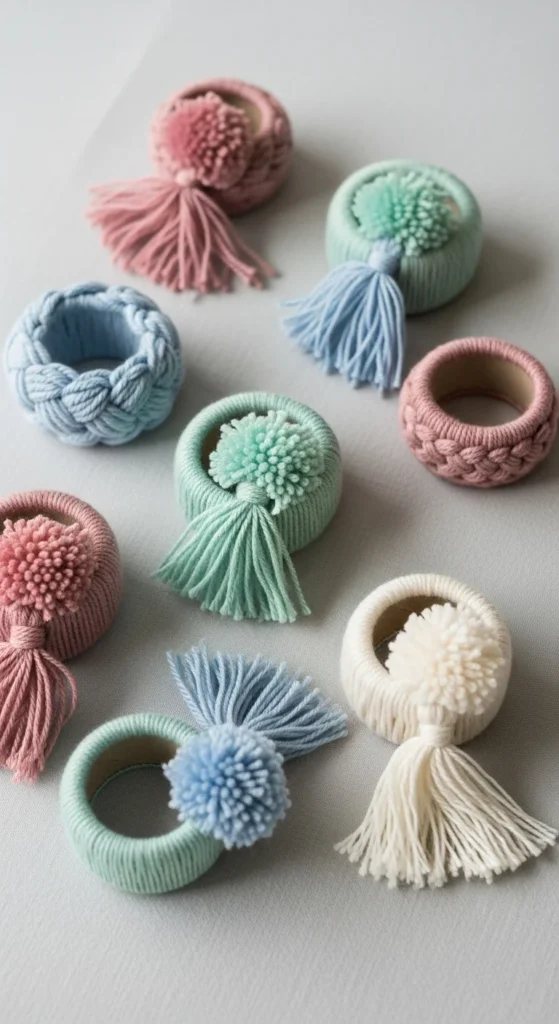
Yarn-wrapped cardboard rings are soft and easy. Wrap yarn tightly around a cardboard base.
Change yarn colors as desired. Secure ends with glue.
Yarn scraps work well here. This option is light and easy to store.
18. Shell Accent Napkin Rings
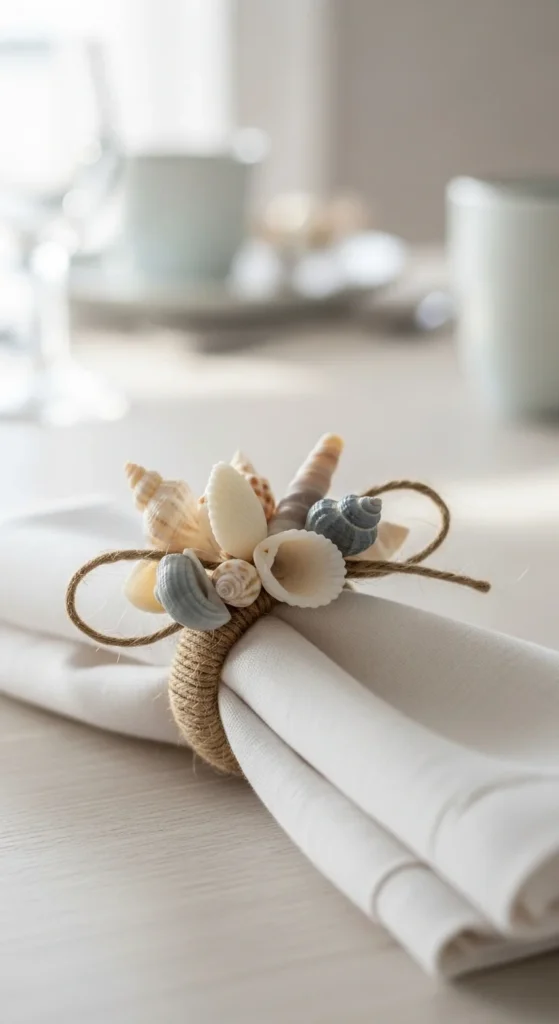
Shell accent rings suit coastal tables. Attach small shells to rope or twine loops.
Keep shells light to avoid weight. Secure well.
Shells are often free from past trips. Store carefully to avoid chips.
19. Paper Bead Napkin Rings

Paper bead rings are creative and low-cost. Roll paper strips into beads and glue.
Seal with clear finish. String into loops.
This uses scrap paper and basic tools. Let dry fully before use.
20. Minimal String Loop Rings
Simple string loops are subtle. Cut equal lengths and tie into loops.
Choose neutral string for flexibility. Keep knots neat.
This is the fastest option and costs almost nothing. Store rolled to avoid tangles.
21. Mixed Material Napkin Rings
Mixed material rings let you combine leftovers. Use beads, cord, wood, or fabric together.
Keep one element consistent for balance. Test fit before securing.
This approach reduces waste and allows creativity. Each ring can be slightly different while still feeling cohesive.
Conclusion
DIY napkin rings are an easy way to shape how a table feels without spending much or buying new items. With simple supplies and clear steps, each idea here focuses on practical builds that fit everyday use and special gatherings alike. Choose one style or mix several, and let these small details bring personality and care to every place setting.

Leave a Reply