

There’s something magical about Christmas decorations that feel handmade, warm, and full of character. Rustic clay stars check all those boxes. They’re simple enough for beginners, charming enough for Pinterest-lovers, and versatile enough to hang on trees, tie onto gifts, or string into garlands. Before you know it, you’ll be crafting a whole batch of them—each one slightly different, each one uniquely yours.

Let’s walk through how to make these beautifully imperfect Christmas stars that bring a rustic, handmade look to your holiday decor.
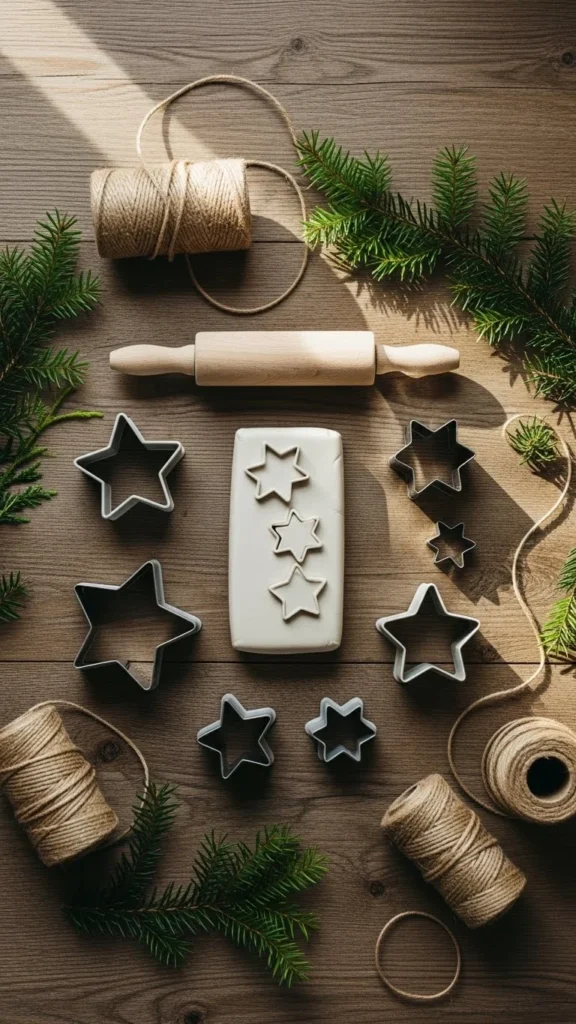
What You Need to Get Started
Working with air-dry clay is relaxing and beginner-friendly. Before you begin shaping your stars, gather a short list of simple supplies.
- Air-dry clay (white or terracotta)
- Rolling pin
- Star-shaped cookie cutters
- Small knife or clay tool
- Wooden skewer or straw (for making hanging holes)
- Twine, ribbon, or jute cord
- Sanding sponge (optional)
- Acrylic paint (optional for details)
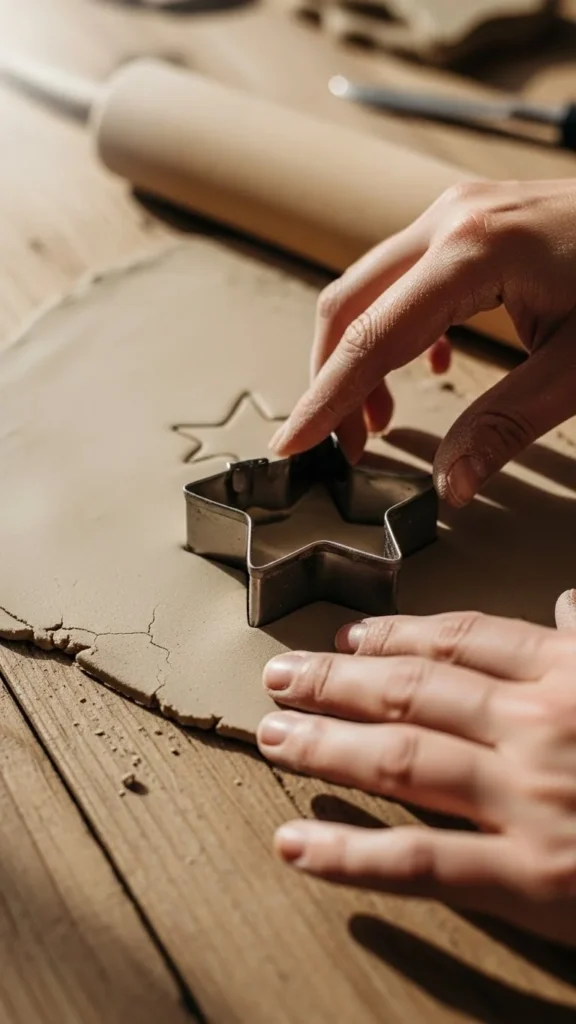
Step 1: Roll and Shape Your Clay
Start by breaking off a chunk of clay and gently kneading it with your hands. This makes it softer, smoother, and easier to roll out.
- Roll the clay to about ¼ inch thickness.
- Press your star cookie cutter firmly into the clay.
- Lift away the excess clay and place the star shapes on parchment paper.
Keep the shapes evenly thick to prevent cracking as they dry. If you want a truly rustic finish, don’t worry about getting the edges perfectly even.
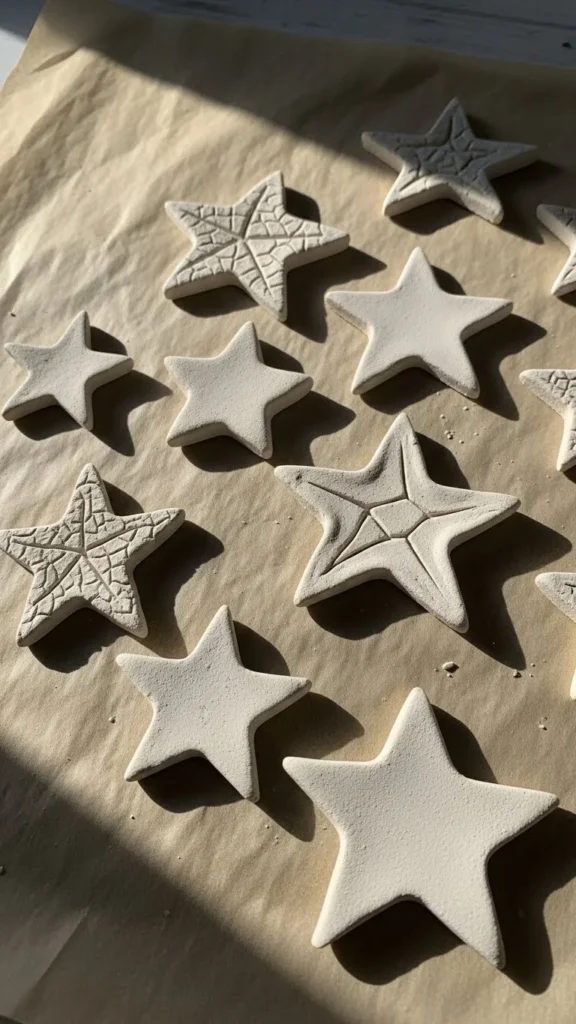
Step 2: Add Details and Texture
This is where your stars gain personality. You can leave them smooth and simple, or try adding texture.
Try these easy detail ideas:
- Press a sprig of evergreen or rosemary into the surface for a botanical imprint.
- Use a small fork or knitting needle to add dotted borders.
- Write initials or short words using a clay tool.
- Press a piece of lace or burlap over the clay to create a pattern.
Don’t forget to make a small hole near the top using a straw or wooden skewer. This will be used for hanging later.
Step 3: Let Your Stars Fully Dry
Air-dry clay typically takes 24–48 hours to completely harden, depending on thickness and room temperature. Lay your stars somewhere flat with good air circulation.
To avoid warping:
- Flip them halfway through the drying time.
- Keep them out of direct heat or sunlight.
Once they’re dry, you can lightly sand the edges for a smoother finish—or leave them rustic and natural.
Step 4: Decorate With Paint or Keep Them Natural
One of the best parts of making clay stars is choosing the finish. Both painted and unpainted versions look gorgeous.
Natural & Minimal:
Keep them unpainted for a soft, Scandinavian-inspired look. Pair with jute cord for extra rustic charm.
Painted Accents:
- Add white dots to mimic falling snow.
- Paint just the edges in gold or soft metallic tones.
- Use a dry-brush technique to give a slightly distressed effect.
Stained Look:
Watered-down brown or grey acrylic paint can give them a muted, aged feel.
Step 5: Add Twine and Display
Once your stars are dried and decorated, thread twine or ribbon through the hole.
These clay stars work perfectly as:
- Tree ornaments
- Gift tags
- Garland pieces
- Napkin tie-ons for holiday tables
- Keepsake tokens for guests
The best part? Every star looks handmade and heartfelt—something store-bought decor can never quite capture.

Extra Tips for Even Better Results
- If cracks appear, gently smooth them with a little water before drying.
- Don’t rush the drying process—slow drying makes stronger stars.
- Mix white and terracotta clay pieces for a marbled effect.
- Create mini sets in different sizes for layered decor.
Final Thoughts
Making rustic DIY Christmas clay stars is one of those crafts that’s calming, beautiful, and surprisingly simple. Whether you’re decorating your home or preparing handmade gifts, these little stars add warmth and charm to every corner of the season.
Save this idea for later—and try making a fresh batch each year to grow your collection!

Leave a Reply