

Looking for a charming way to present gift cards, money gifts, jewelry, or tiny keepsakes this Christmas? Felt gift envelopes are the cutest, coziest solution. They’re soft, customizable, and incredibly fun to make—even if you’re new to sewing. Plus, they bring that handmade magic money simply can’t buy.
These envelopes add personality to every present and let you skip store-bought packaging entirely. Let’s walk through how to sew your own in easy, beginner-friendly steps.
Choose Your Materials
Before you start stitching, gather a few simple supplies. You don’t need fancy tools—just cozy felt and a few basics.
- Felt sheets in your preferred Christmas colors
- Embroidery thread or standard sewing thread
- Needle
- Scissors
- Ruler
- Buttons, ribbons, bells, or other cute embellishments
- Fabric glue (optional)
Felt is perfect for beginners because it doesn’t fray. You can cut it cleanly, shape it easily, and stitch through it without effort. Choose thicker felt if you want a sturdier envelope, or softer felt for a more delicate look.
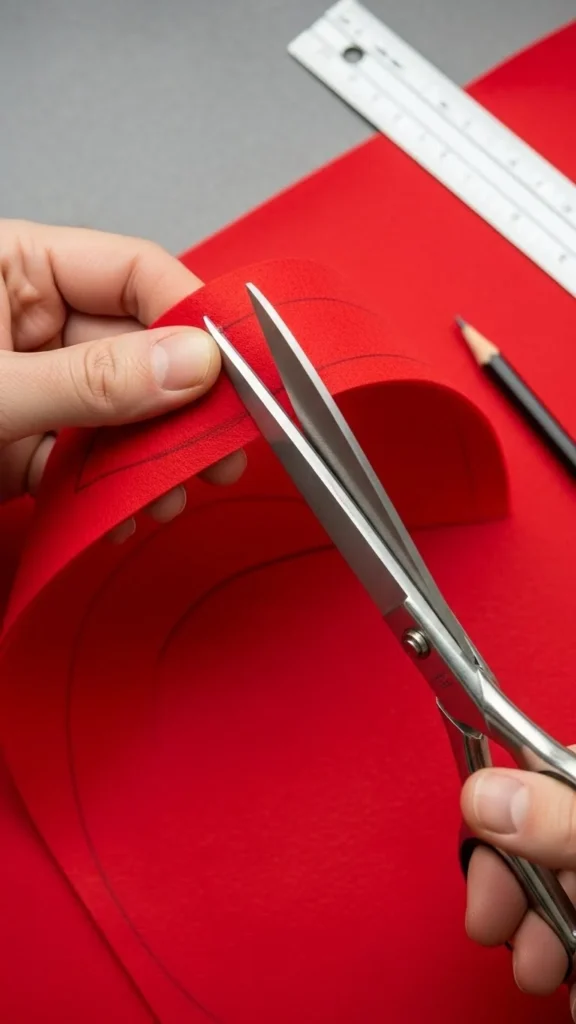
Cut the Envelope Shape
Felt gift envelopes are typically made from one flat piece that folds into shape. Creating the base is straightforward:
Step-by-Step Cutting
- Cut a rectangle that’s about 8 inches by 6 inches—adjust depending on what you’re gifting.
- Fold the bottom two-thirds upward to form the pocket.
- Leave the top third as your flap.
- Trim the flap into a curve, point, or scallop shape to give it personality.
Pro tip: Using a plate or round lid makes it easy to cut smooth curves.
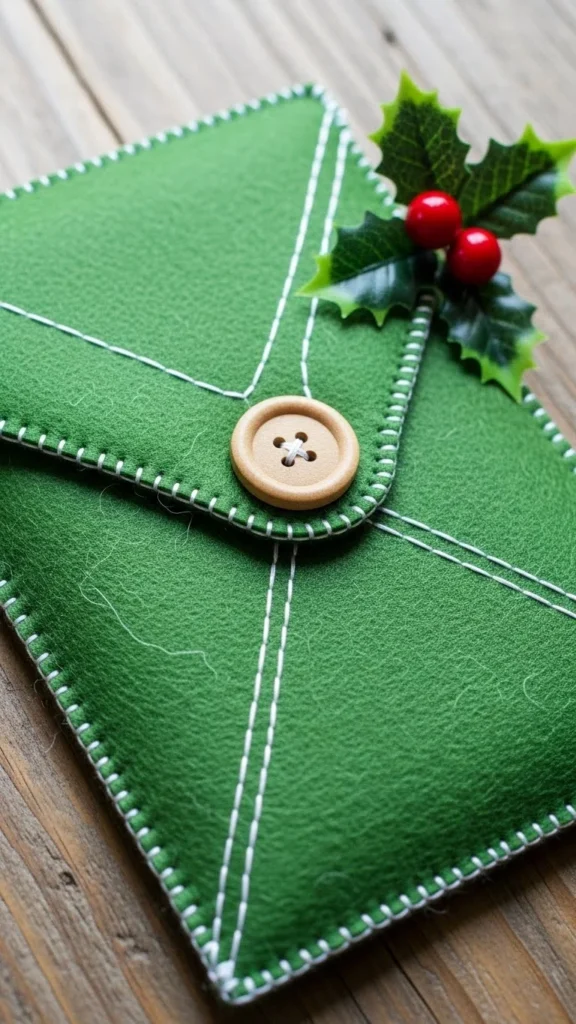
Stitch the Edges
Now comes the part that makes these envelopes feel truly handmade: stitching. The blanket stitch is the prettiest option, but any simple stitch works.
How to Blanket Stitch
- Thread your needle with embroidery floss.
- Tie a knot at the end.
- Start from inside the fold to hide the knot.
- Loop your stitches evenly around the edges for a neat, decorative finish.
Take your time—rhythmic stitching is one of the most relaxing parts of the project.
Tip for Beginners
If hand-stitching feels intimidating, you can cheat a little and use fabric glue for the inner seams. But stitching does give it that authentic, heirloom-quality charm.
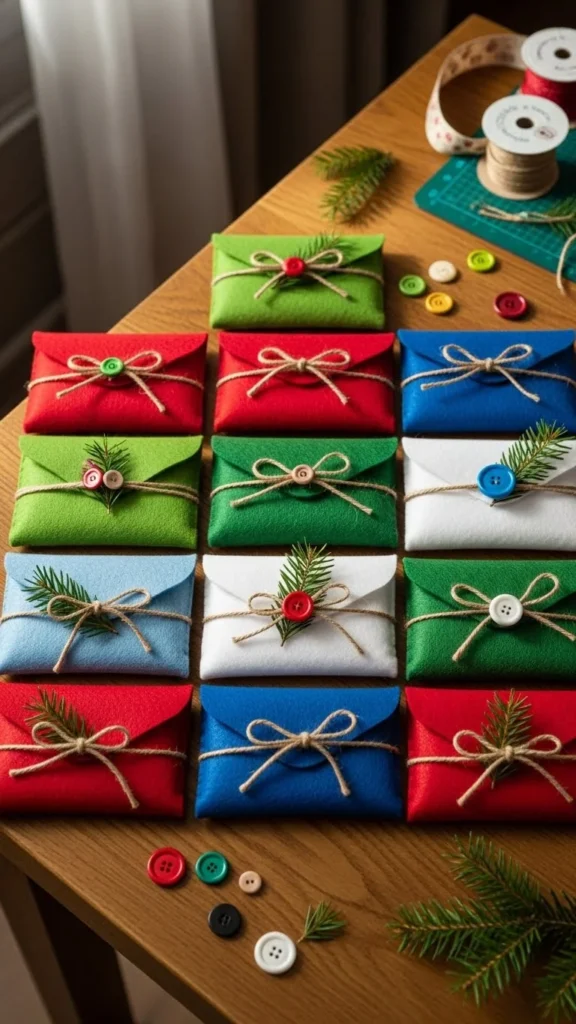
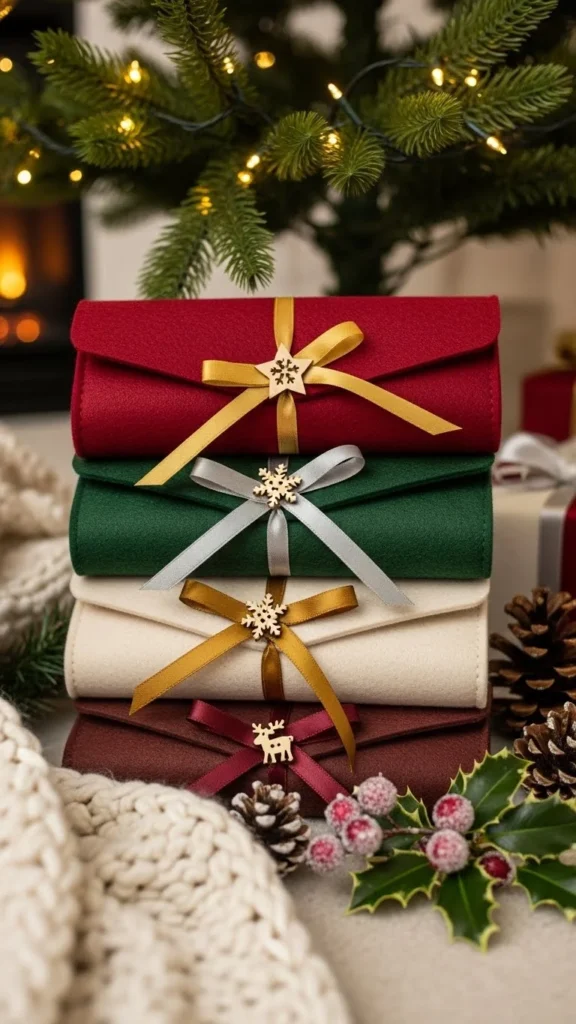
Add Embellishments
This is where the magic happens. Once your envelope is stitched, dress it up with details that reflect your holiday style.
Decoration Ideas
- Buttons: A wooden button adds rustic charm.
- Mini faux berries: Perfect for a festive pop of red.
- Ribbon ties: Wrap around the envelope for a soft, elegant closure.
- Embroidery: Stitch initials, stars, hearts, or a tiny Christmas tree.
Keep embellishments flat if the envelope needs to slide into a stocking or a cardholder, but feel free to go all-out if it’s meant to sit under the tree.
Secure the Closure
Every envelope needs a way to stay shut. You can keep it simple or get creative.
Closure Options
- Button & loop: Stitch a button and create a loop from string or ribbon.
- Snap fasteners: Great for kids.
- Tie closures: Attach two ribbons—one on the flap, one on the body—to tie a sweet little bow.
- Velcro dots: Quick and clean.
Each closure style gives your envelope a different vibe, from rustic farmhouse to modern minimalist.
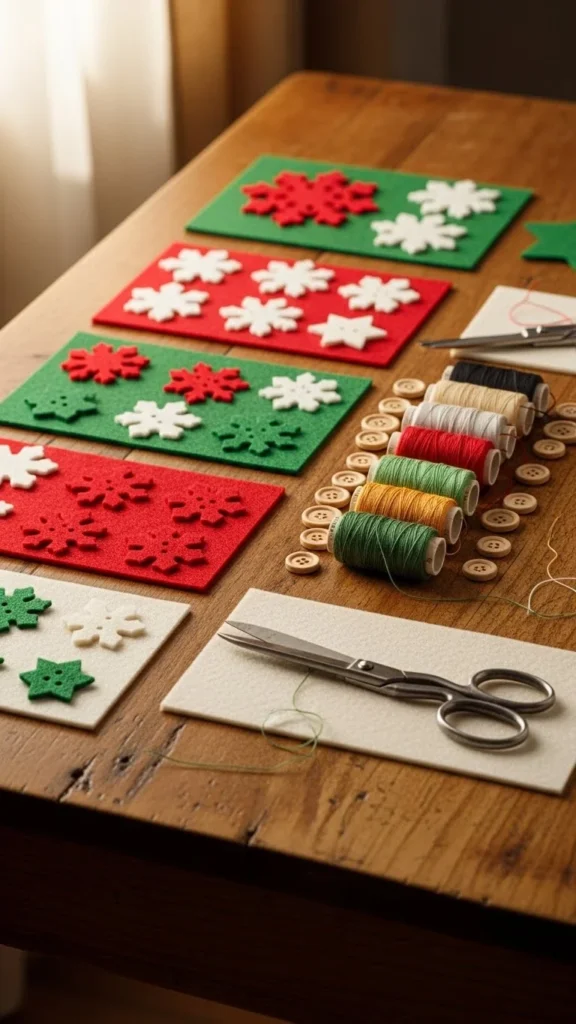
Creative Variations to Try
Want to make your envelopes even more unique? Try these fun twists:
1. Two-Tone Felt Envelopes
Use one color for the body and another for the flap. Think cream + forest green or red + soft grey. The contrast looks boutique-level.
2. Mini Envelope Ornaments
Shrink the pattern and create gift-card-sized envelopes you can hang on the tree.
3. Personalized Initial Envelopes
Cut felt letters and stitch them onto the flap. This turns each envelope into a mini monogrammed keepsake.
4. Themed Embroidery Styles
Try stitching:
- Stars
- Snowflakes
- Candy cane stripes
- Tiny hearts
These small accents make your envelope feel purposeful and thoughtful.
Why These Envelopes Make the Sweetest Gifts
Handmade gift packaging shows intention and care. It turns even the smallest gift into something meaningful. Plus, the envelopes are reusable—your friends and family may use them for future holidays, ornaments, or keepsake storage.
They’re also:
- Budget-friendly
- Beginner-approved
- Fun to craft in batches
- Kid-friendly (with adult supervision)
If you’re hosting a holiday craft night, this is an ideal project!
Final Touches
Before gifting, tuck a little surprise inside—jewelry, photos, tiny notes, or gift cards. Then place the envelope under the tree or tie it onto a wrapped present for added charm.
Wrap-Up
DIY Christmas felt gift envelopes are adorable, easy, and endlessly customizable. Whether you’re gifting something tiny or simply want to make your presentation more heartfelt, these handmade envelopes add warmth to every holiday moment.
Save this idea for later and pin it for your next cozy craft night!

Leave a Reply