

There’s something magical about wrapping a gift with paper you designed yourself. It feels personal, thoughtful, and wonderfully festive. DIY Christmas gift wrap stencils make it incredibly easy to turn plain kraft paper into custom holiday art. Whether you’re creating mini snowflakes, cozy winter motifs, or bold geometric trees, this simple craft instantly elevates your wrapping game.
If you love hands-on holiday creativity, this guide will walk you through everything—choosing materials, making stencils, adding paint, and designing your own patterns.
Gather Your Supplies
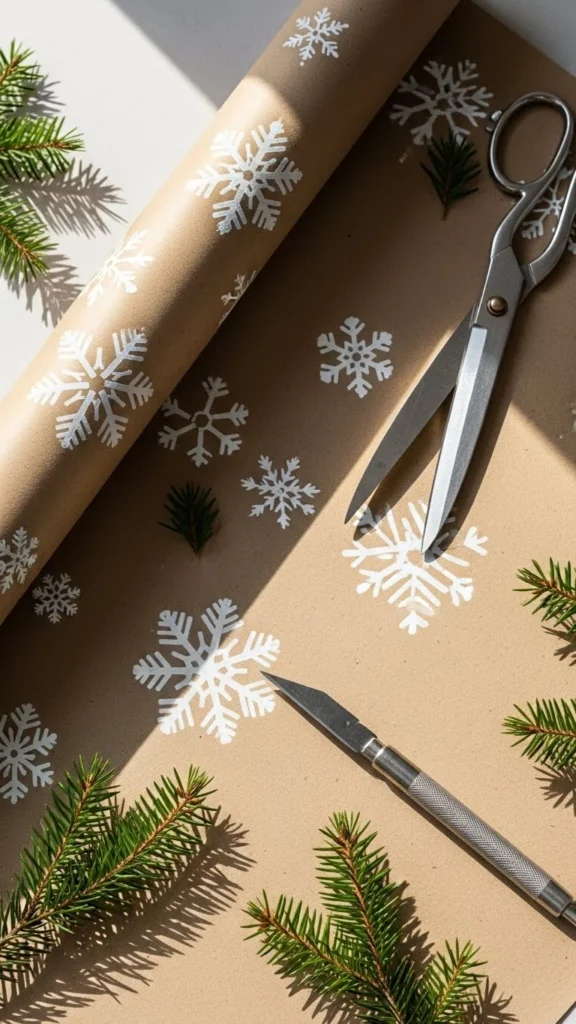
Before you begin cutting shapes and decorating paper, take a moment to gather all the essentials. Having everything ready makes the crafting process smoother and more enjoyable.
You’ll need:
- Kraft paper or any plain gift wrap
- Thin plastic sheets or sturdy cardstock for stencils
- Pencil
- Craft knife or precision cutter
- Self-healing cutting mat
- Tape
- Sponge brushes or small paint rollers
- Acrylic paint

Choose thicker stencil sheets if you plan to reuse them throughout the season. They won’t bend easily and create much cleaner patterns.
Design Your Christmas Stencils
This is the fun part—sketching your holiday shapes! You can make your designs simple or detailed depending on your style and patience level.
Popular DIY stencil shapes include:
- Stars
- Snowflakes
- Stylized Christmas trees
- Bells
- Gingerbread men
- Holly leaves
- Candy canes
- Snowy branches
Begin with easy outlines to warm up. The simpler the silhouette, the cleaner it will transfer onto your wrapping paper.
After sketching your shapes on the stencil sheet, carefully cut them out using your craft knife. Move slowly around curves and corners to avoid tearing or jagged edges.
Tip: If drawing isn’t your strength, trace cookie cutters or print silhouettes from a free design library.
Choose the Right Paint Application Method
Different paint tools create different finishes. Think about the style you want before loading your brush.
Sponge brushes
These are great for giving your wrapping a soft, dusted look. Perfect for snow-themed stencils.
Small paint rollers
Use these for bold, clean shapes. They apply paint evenly and work well for larger silhouettes.
Small detail brushes
Ideal for adding tiny accents around your stencil or filling in gaps.
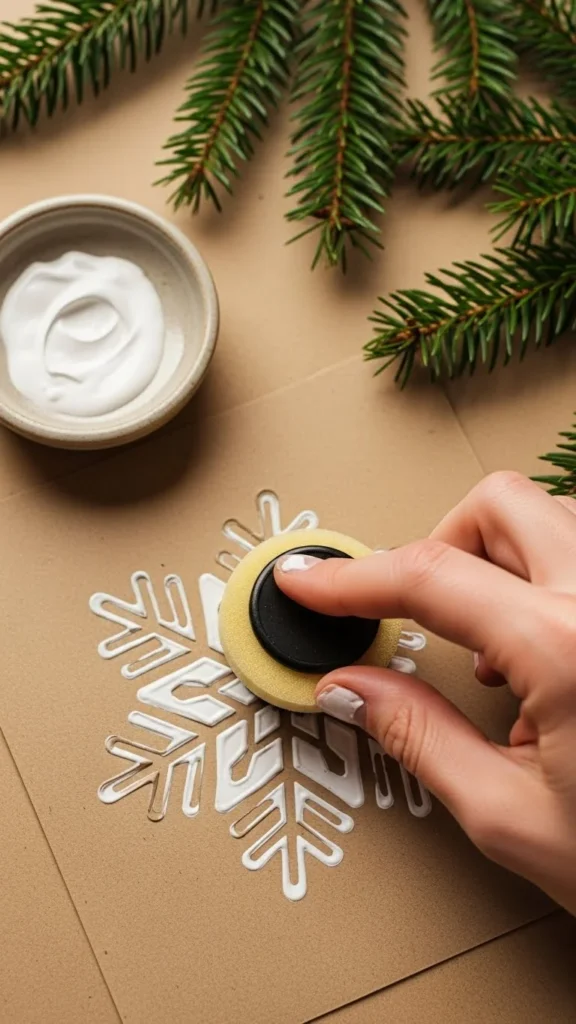
When applying paint, dab gently instead of dragging the brush. This prevents smears and keeps lines crisp.
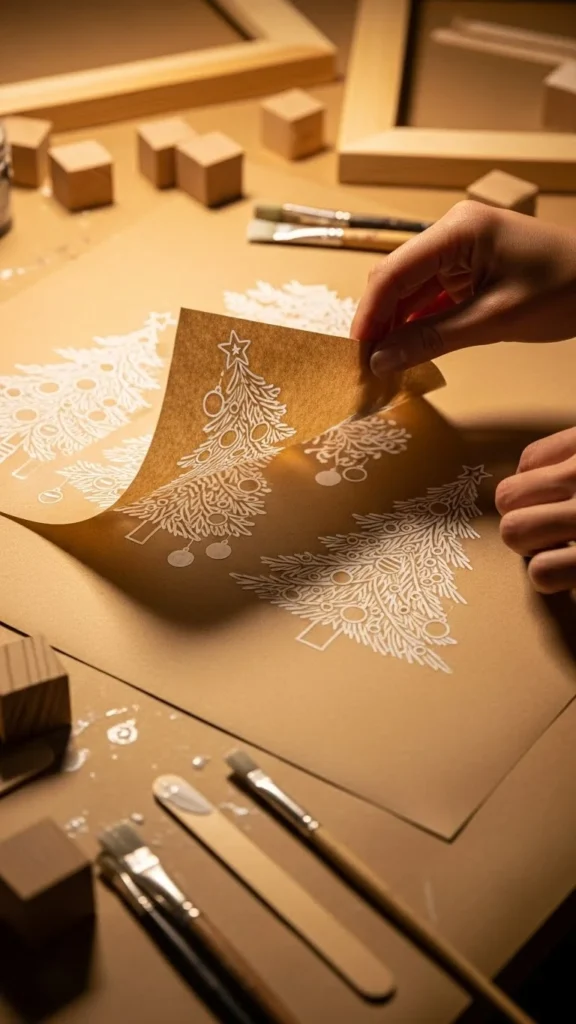
Stenciling Your Wrapping Paper
Now it’s time to bring your designs to life.
- Lay out the kraft paper on your table or floor. Tape the corners so the paper doesn’t shift.
- Position your stencil on the paper and secure it lightly with tape.
- Dab or roll the paint onto the stencil openings.
- Lift the stencil slowly to reveal the design.
- Repeat the pattern across the sheet, spacing shapes however you like.
Play around with pattern styles:
- Uniform rows for a clean, modern look
- Scattered placement for a playful snowy feel
- Layered designs for depth and texture
Let the paint dry fully before wrapping any gifts. This keeps the paper smooth and prevents smudging.
Add Tiny Extras for a Luxe Finish
Once your stenciled pattern is dry, you can embellish your paper even further.
Try adding:
- Dots of gold acrylic paint using a cotton swab
- Hand-drawn stars or mini branches
- Small stickers or pressed leaves
- A light dusting of glitter in matching colors
Pair your paper with elegant ribbon, twine, pine sprigs, or a handmade gift tag to create a complete, polished presentation.
Wrap, Tie, and Enjoy Your Custom Creations
Now comes the most satisfying part—using your custom paper to wrap gifts. Fold slowly, tape neatly, and admire your beautiful handmade patterns. Each package becomes a tiny piece of holiday art that shows extra care and creativity.
Holiday gifting is all about thoughtful gestures, and taking the time to make your own wrapping adds a personal touch your loved ones will instantly appreciate.
Save this tutorial for later so you can create new stencil designs every Christmas!

Leave a Reply