

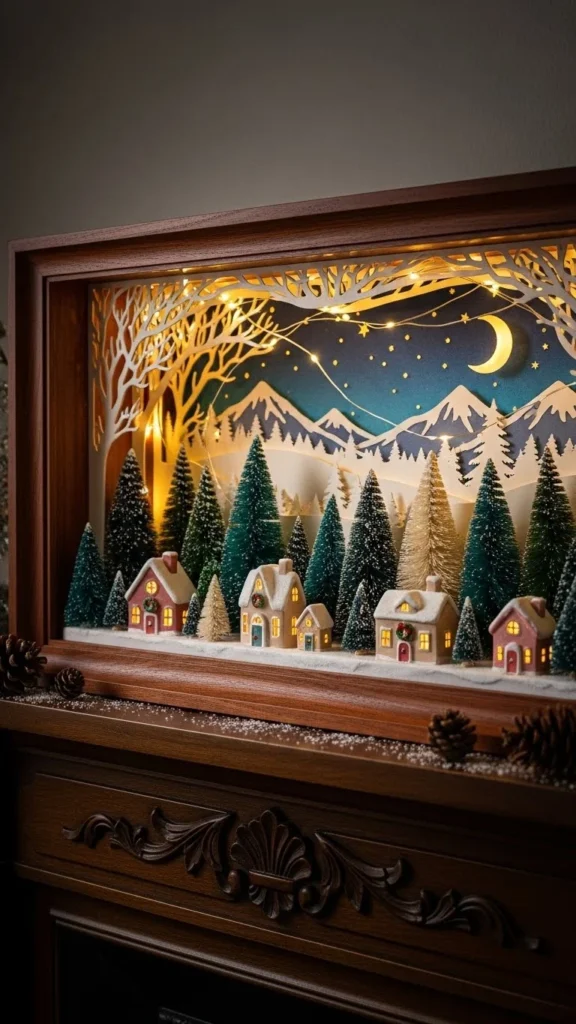
There’s something special about a Christmas shadow box—tiny winter scenes glowing softly behind glass, little cutouts that look almost alive, and layers that add depth and charm. If you want a holiday project that feels cozy, whimsical, and surprisingly easy to make, a Christmas shadow box is the perfect craft to try.
In this guide, you’ll learn how to design your own magical display from scratch. Whether you love paper crafts, miniature scenes, or simple décor upgrades, you’re about to create something that will look store-bought but feel totally personal.
Gather Your Supplies and Choose a Theme
Before you start assembling anything, spend a moment picking a theme. Your shadow box will look more polished if the style and colors feel intentional.
Some popular Christmas themes include:
- Winter village with snowy roofs
- Santa’s workshop
- Minimalist forest silhouettes
- Reindeer in a snowy meadow
- Nativity-inspired night sky scenes
Once your theme is set, gather the basics:
- Shadow box frame (any size you prefer)
- Cardstock, glitter paper, or craft foam
- Mini bottle-brush trees or figurines
- Fairy lights with a thin wire
- Glue gun or tacky glue
- Scissors or cutting machine (optional)
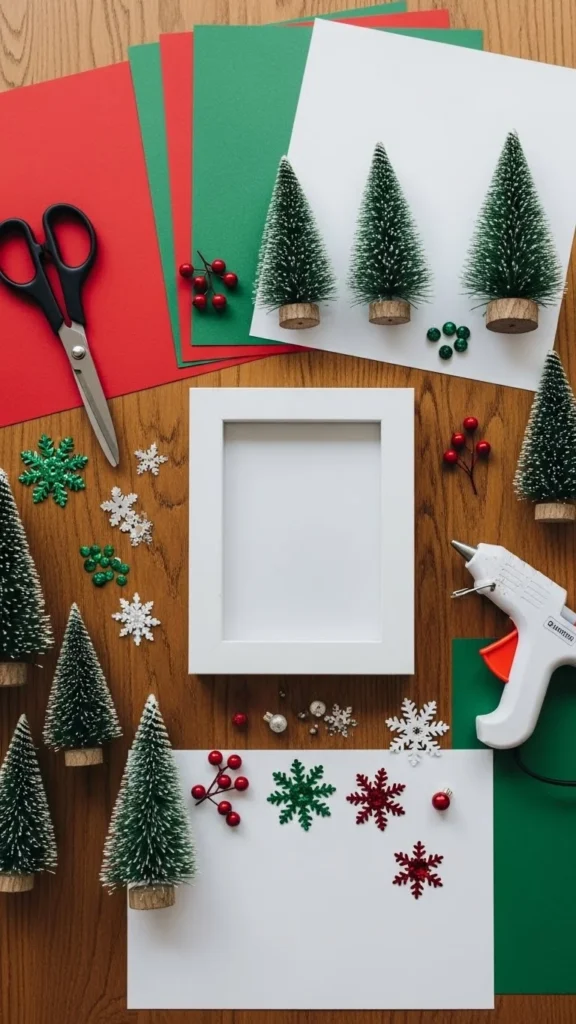
Keep your color palette simple—two to three colors usually look the best. Metallics like gold or silver add a festive touch without feeling overwhelming.
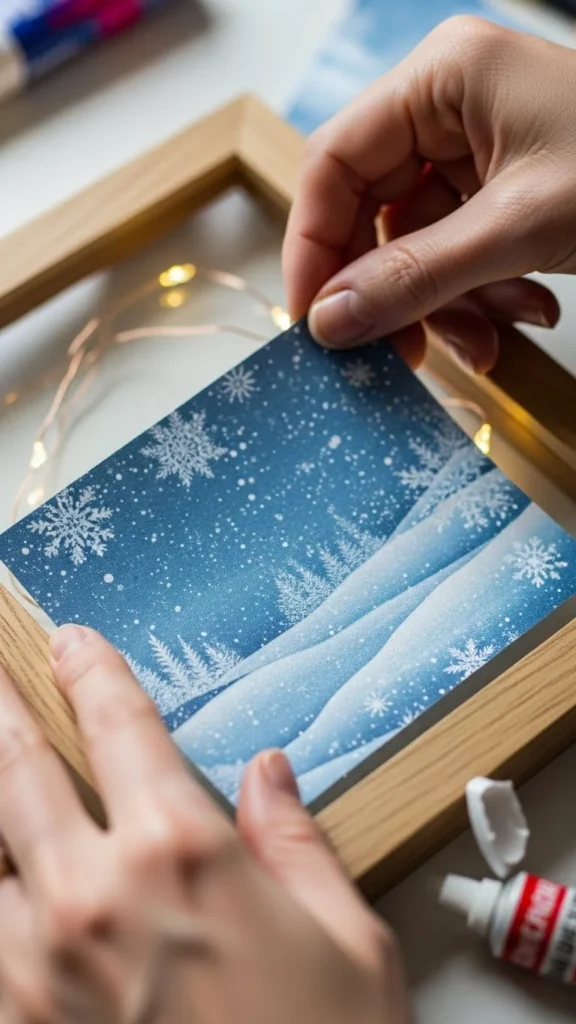
Design the Background Layer
This first layer sets the tone for your entire box. Think of it as the “sky” of your scene.
You can create a background by:
- Using gradient blue paper for a dusk effect
- Adding tiny paper stars
- Gluing soft cotton to mimic light clouds
- Using scrapbook paper with subtle snow designs
Cut your background to fit the interior dimensions of the box. Glue it down flat so you have a clean starting point.
If you want extra magic, place one small cluster of fairy lights at the back before attaching the background. This will make the whole scene glow from behind.
.
Build Layered Silhouettes for Depth
Shadow boxes look magical because of their depth. To get that 3D effect, use multiple layers of cutouts, spacing each one forward in the frame.
Tips for Layering:
- Use foam spacers or folded cardstock to separate each layer.
- Cut shapes that represent the “foreground,” “mid-ground,” and “background.”
- Keep the front layers darker and the back layers lighter to create visual depth.
Some layering ideas:
- Back: Distant snowy mountains
- Mid: Houses or pine trees
- Front: Fence, larger trees, or silhouettes of children playing in the snow
Don’t worry about perfection—shadow boxes are forgiving, and the soft glow will hide small mistakes.
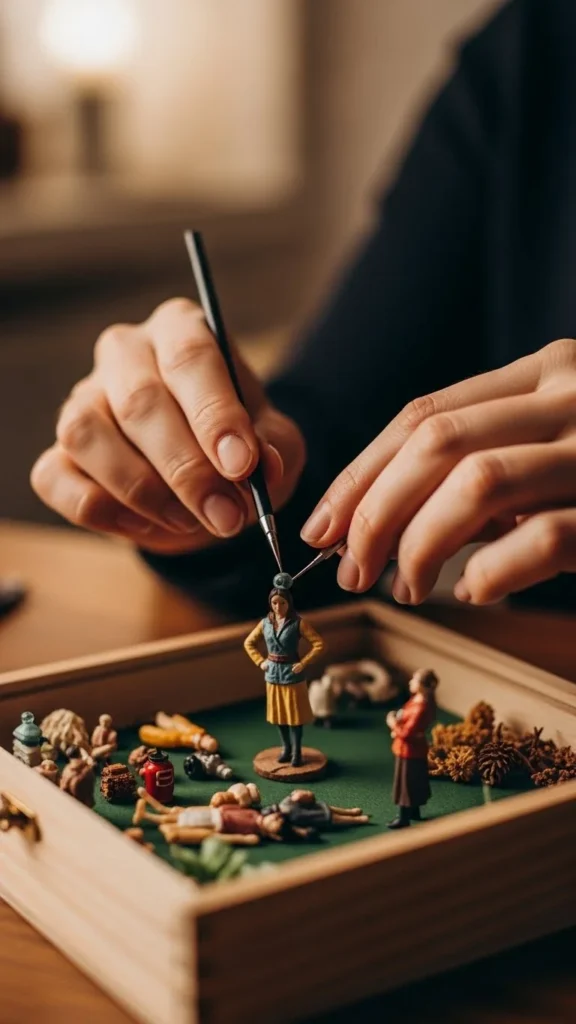
Add Miniature Elements for Realistic Charm
This is where your box truly comes alive.
Mini items like tiny trees, mini sleighs, small gift boxes, or figurines give your display dimension that paper alone can’t achieve.
Place them carefully:
- Use a glue dot instead of hot glue if you’re unsure—easier to reposition
- Keep the center of the box the most detailed area
- Don’t overfill; simplicity often looks more elegant
You can even sprinkle a small amount of faux snow or glitter at the bottom for a frosty finish.
Install Fairy Lights for a Magical Glow
Fairy lights are the secret ingredient that transforms a simple shadow box into a glowing holiday showpiece.
Here’s how to add them without creating a mess:
- Use a thin wire string light—these bend easily
- Tape the wire around the interior edges, hiding it behind silhouettes
- Place the battery pack at the back of the frame (most boxes have space)
- Turn the lights on before sealing the back to check for bright spots or gaps
Warm white lights work best for a cozy Christmas feel, but cool white looks beautiful with winter-themed scenes.
When the lights shine behind your layered paper and mini pieces, you’ll get that dreamy glow that makes shadow boxes so enchanting.
Assemble and Seal Your Display
Once everything is placed exactly where you want it, close the shadow box gently and test the lights.
Check for:
- Balanced brightness
- Even spacing
- Secure positioning of mini items
- Clean glass (wipe fingerprints!)
If something feels off, don’t worry—shadow boxes are easy to reopen and adjust.
Place your finished display on:
- A mantel
- A bookshelf
- A coffee table
- An entryway console
- Next to your Christmas village setup
Anywhere with low to moderate lighting will help your shadow box shine at its best.
Creative Variations to Try
Once you master the basics, try making a few themed versions:
- Metallic silver forest with sparkling silhouettes
- Red and white peppermint-style box with candy-stripe backgrounds
- Woodland animals in a snowy forest
- Minimalist nativity silhouette with soft lights and layered hills
These make wonderful gifts, too—handmade, heartfelt, and totally customizable.
Final Takeaway
Creating a DIY Christmas shadow box is an easy way to add holiday magic to any room. With just a few layers, some thoughtful details, and warm lights, you can design a cozy glowing scene that feels timeless and festive.
If you loved this project, save this idea for later and make a few more to build your own holiday collection!

Leave a Reply