

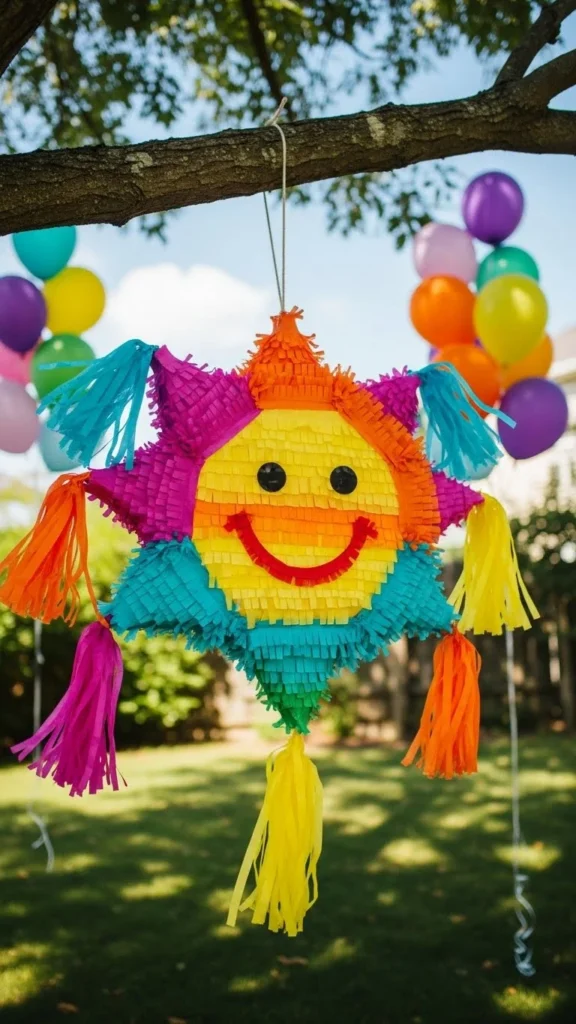
A piñata isn’t just a party game—it’s a centerpiece. The right decorations can turn a simple papier-mâché base into a show-stopping accent that ties the whole celebration together. Whether you’re planning a kid’s birthday, a seasonal bash, or a cozy backyard get-together, themed piñata decor adds instant personality and photo-worthy charm.
Below is a step-by-step, theme-friendly approach to decorating piñatas that look polished, playful, and totally on-point—no advanced crafting skills required.
Start With a Solid Base Shape
Before you think about colors or details, choose a piñata shape that works with multiple themes. A smart base makes decorating easier and more flexible.
Versatile shapes to begin with:
- Classic donkey or star – easy to adapt with colors and add-ons
- Number or letter – perfect for birthdays and milestones
- Round or oval – ideal for animals, planets, or emoji-style designs
Stick to simple silhouettes if you want clean results. Intricate shapes are fun, but they require more time and precision when decorating.
Quick tip: If you’re reusing a store-bought piñata, lightly trim or reinforce loose edges with paper strips before decorating.
Choose a Color Palette That Sets the Theme
Color does most of the storytelling. A tight palette instantly communicates your theme—even before you add details.
Theme-based color ideas:
- Jungle or safari: greens, browns, soft yellows
- Princess or fairytale: blush pink, lavender, soft gold tones
- Space or galaxy: deep blue, purple, silver accents
- Fiesta or summer: bright pink, turquoise, sunny yellow
Limit yourself to 2–3 main colors plus one accent. This keeps the piñata from looking busy and helps it photograph beautifully.
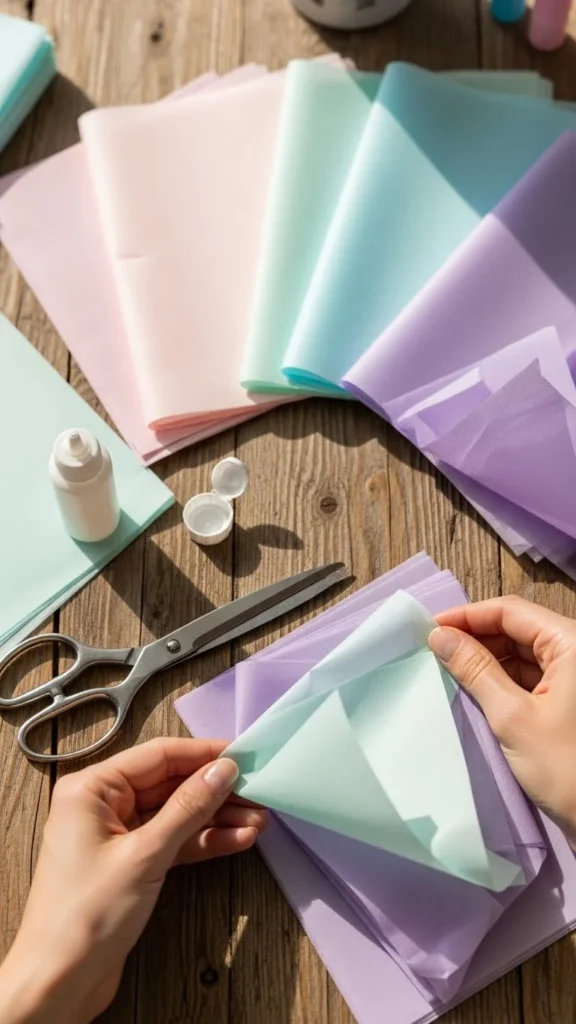
Master the Fringe Technique for Full Coverage
Fringe is the secret weapon of piñata decorating. It adds texture, movement, and depth with very little effort.
How to do it well:
- Cut tissue paper into strips about 3–4 inches wide
- Make small snips along one edge to create fringe
- Glue strips from bottom to top, slightly overlapping
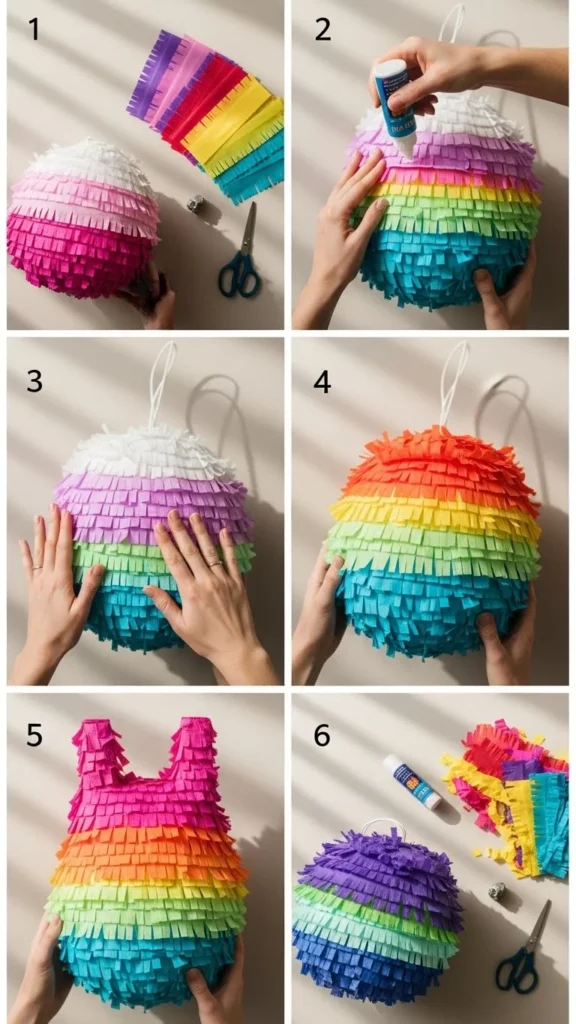
Pro styling tips:
- Alternate shades of the same color for a layered look
- Use metallic or shimmer paper sparingly for highlights
- Keep fringe lengths consistent for a tidy finish
This method works for nearly every theme and hides imperfections beautifully.
Add Theme-Specific Details With Lightweight Materials
Once your base is covered, it’s time for personality. Details are what transform a generic piñata into a custom showpiece.
Easy add-ons that work for any theme:
- Cardstock cutouts (stars, hearts, leaves, numbers)
- Crepe paper flowers or tassels
- Foam shapes for eyes, logos, or icons
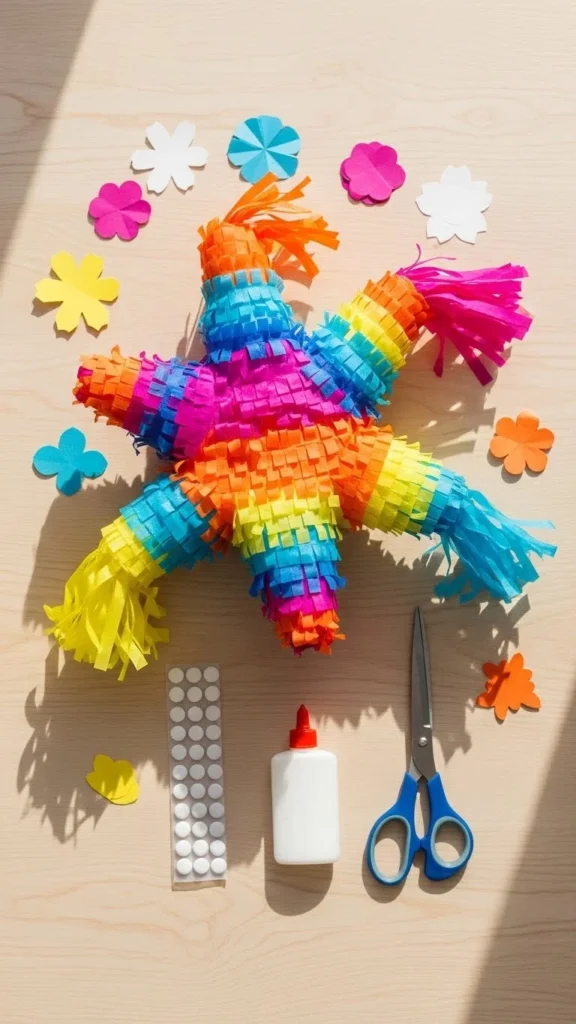
Attach details with craft glue or glue dots, and keep everything lightweight so the piñata hangs evenly.
Design rule: Step back every few additions. If it looks complete from a distance, stop. Over-decorating can overwhelm the shape.
Match the Piñata to the Party Setup
A well-decorated piñata should feel like it belongs in the space—not like an afterthought.
Coordinate with:
- Tableware colors
- Balloon garlands or streamers
- Backdrop materials
If your party leans minimal, keep the piñata simple and textured. If the setup is bold and colorful, lean into contrast with brighter fringe or playful shapes.
Hanging height also matters. Position the piñata where it’s visible in photos but not blocking foot traffic.
Finishing Touches That Elevate the Look
Before party day, do a final polish:
- Trim uneven fringe
- Secure loose edges
- Add a small ribbon or bow at the hanger point
A clean finish makes even simple designs feel intentional and high-quality.
Final Takeaway
Decorating piñatas that match any theme is all about smart shapes, cohesive colors, and thoughtful details. You don’t need fancy tools—just a clear plan and a little creativity. With these tips, your piñata can double as décor and delight guests long before the first swing.
Save this guide for your next celebration and turn every piñata into a picture-perfect party moment.

Leave a Reply