

Tassel garlands are one of those decor details that instantly make a space feel styled and intentional. They’re playful without being childish, trendy without feeling overdone, and versatile enough to work for birthdays, baby showers, holidays, or everyday home decor. The best part? You can make them yourself in under an hour—and customize them to fit any vibe.

Whether you want something boho, modern, or colorful, this guide walks you through exactly how to make tassel garlands that look polished and Pinterest-worthy.
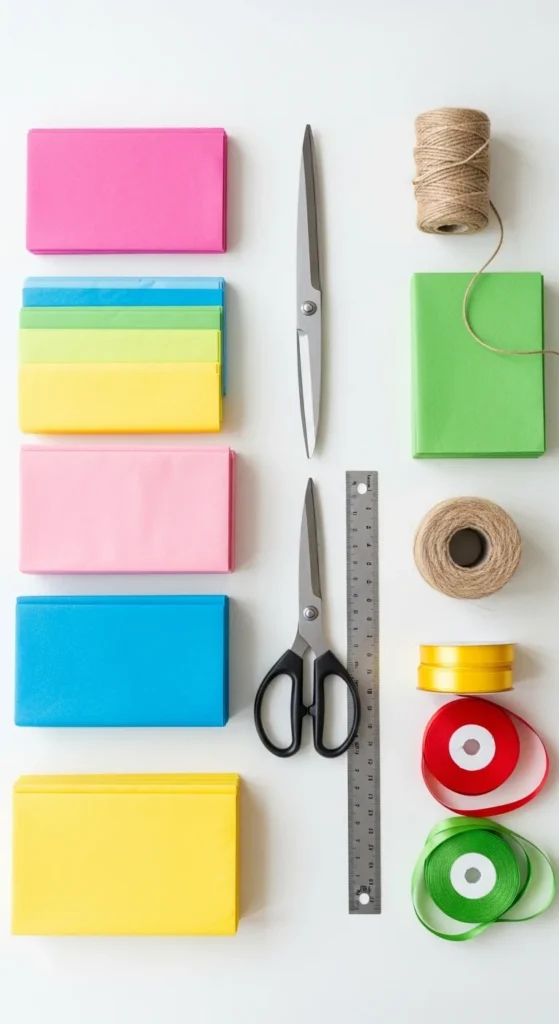
What You’ll Need to Get Started
Before diving in, gather your supplies. Most of these are affordable and easy to find at craft stores or online.
Basic supplies:
- Tissue paper, cardstock, yarn, or fabric
- Scissors
- Twine, string, or ribbon
- Ruler (optional, but helpful)
- Tape or glue dots
Optional extras for style upgrades:
- Metallic or textured paper
- Neutral-toned ribbons
- Wooden beads
- Tassel makers (nice, but not required)
Choose your materials based on where the garland will hang. Tissue paper is great for parties, while yarn or fabric works better for long-term decor.
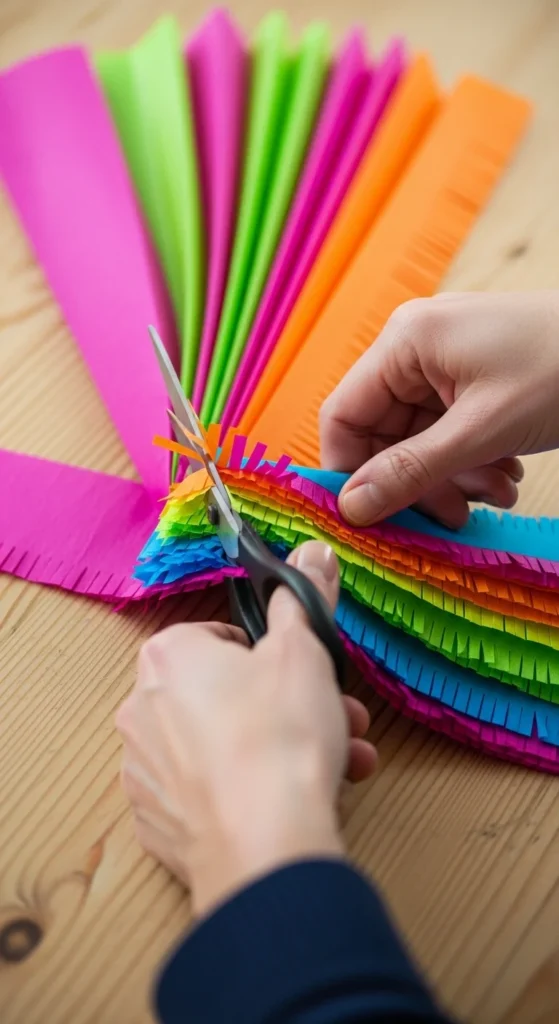
Step-by-Step: How to Make Classic Tassels
This method works for tissue paper, cardstock, or thin fabric.
Step 1: Cut Your Material
- Cut rectangles about 10 x 15 inches for medium tassels.
- Stack multiple sheets if you want fuller tassels.
- Keep sizes consistent for a clean look.
Step 2: Create Fringe
- Fold the rectangle in half lengthwise.
- Cut fringe from the open edge upward, stopping about 1 inch from the fold.
- The thinner the fringe, the more refined the tassel looks.
Step 3: Roll and Twist
- Unfold the paper and roll it tightly from one short end.
- Twist the top to form a loop.
- Secure with a small piece of tape if needed.
Repeat until you have enough tassels to fill your garland.
Assembling Your Tassel Garland
Now comes the fun part—turning individual tassels into a finished piece.
- Cut your string or ribbon slightly longer than your desired length.
- Slide tassels onto the string by threading through the loop.
- Space them evenly, or cluster them for a fuller look.
- Alternate colors and textures for visual interest.

Pro tip: Step back every few tassels to check balance and spacing before adding more.
Trendy Style Ideas That Look Designer-Made
If you want your tassel garland to feel current, try one of these popular styles:
Neutral & Minimal
- Shades of cream, beige, and soft gray
- Linen ribbon or cotton string
- Perfect for modern homes or nurseries
Boho-Inspired
- Earthy tones like terracotta, sage, and sand
- Yarn or fabric tassels
- Add wooden beads between tassels
Bold & Playful
- Bright colors or ombré gradients
- Mix sizes for a fun, layered effect
- Great for birthdays and celebrations
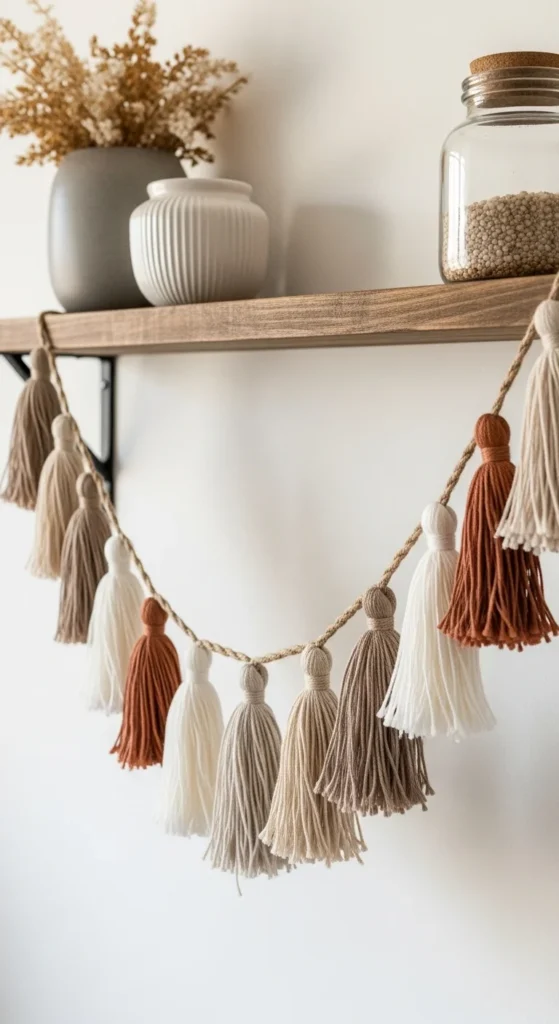
Where to Hang Tassel Garlands for Maximum Impact
Tassel garlands are incredibly versatile. Try hanging yours in places that naturally draw the eye:
- Across a mantel or shelf
- On a party backdrop or dessert table
- Above a bed or crib (out of reach)
- Along stair railings
- Framed around mirrors or windows
Use removable hooks or painter’s tape for damage-free hanging.
Simple Tips for a Polished Finish
Small details make a big difference:
- Trim uneven fringe once tassels are assembled
- Keep a limited color palette for a cohesive look
- Mix textures, not too many colors
- Store garlands flat to reuse later
If it looks slightly imperfect up close, don’t worry—garlands always look better once hung.
Final Thoughts
Tassel garlands are proof that simple DIY projects can still look stylish and intentional. With a few basic supplies and a little creativity, you can make decor that feels custom-made for your space or event.
Save this idea for your next party or decor refresh—and don’t forget to experiment with colors and textures to make it truly your own.

Leave a Reply