

A great birthday photo doesn’t happen by accident—it starts with a backdrop that instantly sets the mood. The good news? You don’t need a professional setup or a big budget to create something camera-ready. With a few simple materials and a little creativity, you can design a DIY birthday backdrop that looks polished, personal, and totally Pinterest-worthy.
Below, you’ll find easy ideas, step-by-step tips, and styling tricks to help you build a backdrop that makes every photo pop.
Choose a Theme That Guides Your Design
Before you grab supplies, decide on a clear theme. This keeps your backdrop cohesive and prevents it from looking cluttered.
Popular backdrop themes include:
- Color-based (pastels, bold brights, neutrals)
- Age milestones (first birthday, sweet sixteen, golden year)
- Hobbies or interests (sports, art, travel, favorite characters)
- Seasonal vibes (spring florals, summer sunshine, cozy winter tones)
Once your theme is set, choose 2–3 main colors and stick to them throughout the backdrop. This simple step alone makes DIY setups look more intentional.
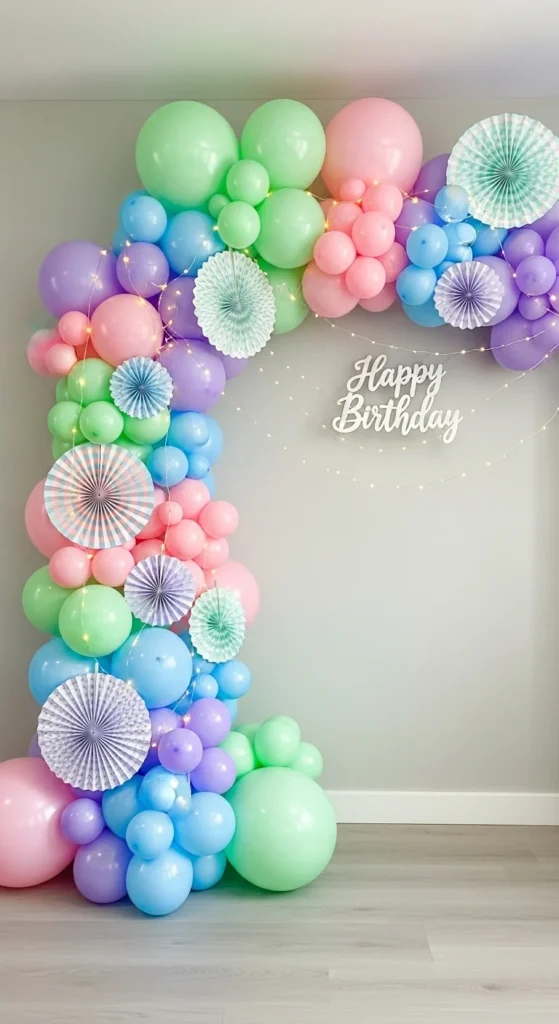
Create a Balloon Backdrop Without Stress
Balloon backdrops look impressive but are easier than they seem. You don’t need helium or expensive kits to pull this off.
What works best:
- Balloon tape or removable hooks
- Different balloon sizes for depth
- Matte balloons for a modern look
Start by inflating balloons in varying sizes. Attach them to balloon tape, then secure the strip to the wall. Build outward instead of upward to create a fuller shape.
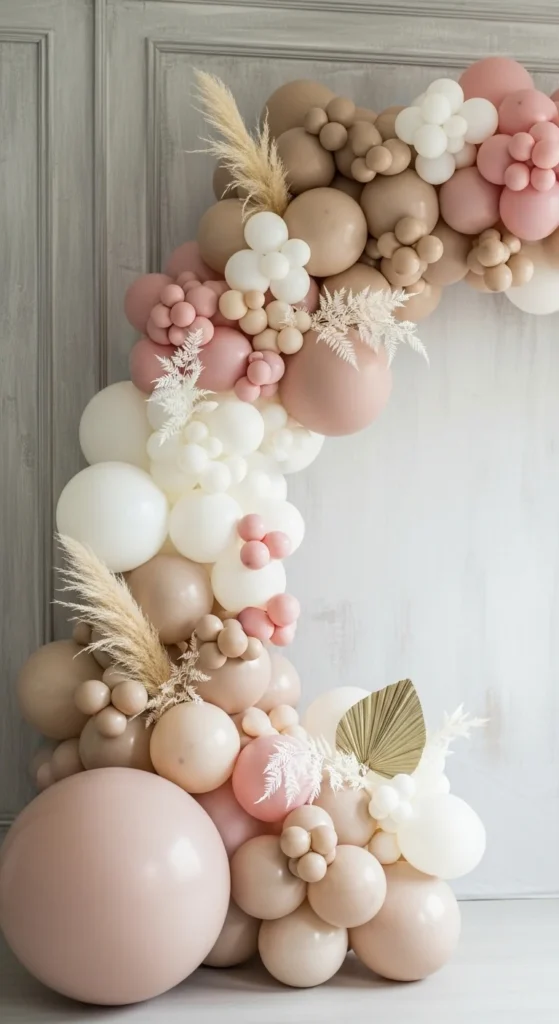
Pro tip: Add a few metallic or clear balloons sparingly for visual interest without overpowering the design.
Use Fabric for an Instantly Polished Look
Fabric backdrops are perfect if you want something soft, elegant, or reusable. Curtains, tablecloths, or lightweight sheets all work well.
Easy fabric ideas:
- Sheer curtains layered over solid fabric
- Vertical fabric panels for a photo booth feel
- Draped fabric with gentle folds for texture
Hang fabric using a curtain rod, tension rod, or removable wall hooks. Iron or steam first—wrinkles show up clearly in photos.

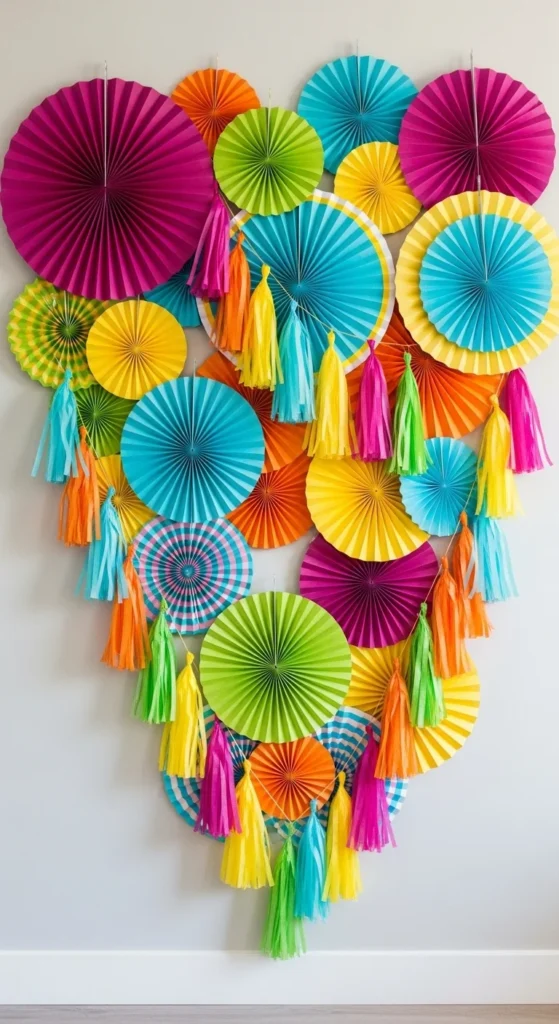
Add Paper Decor for Budget-Friendly Impact
Paper decorations are affordable, lightweight, and perfect for adding personality. They’re also easy to customize for any theme.
Great paper elements include:
- Paper fans in mixed sizes
- Tassel garlands
- Streamers arranged in patterns
- DIY fringe walls made from tissue paper
Arrange paper pieces in clusters instead of spreading them evenly. This creates focal points that naturally draw the camera’s eye.
Build a Statement Centerpiece
Every great backdrop needs a focal point. This is where your eye should land first when looking at the photos.
Statement centerpiece ideas:
- A large number or age cutout
- A handmade name banner
- A circular hoop wrapped in decor
- A simple arch made from PVC pipes and fabric
Keep the centerpiece simple and let the surrounding elements support it. Too many “main” features can make photos feel busy.
Style With Lighting for Better Photos
Lighting can make or break your backdrop. Even the best setup can fall flat in poor lighting.
Simple lighting tips:
- Position the backdrop near a window for natural light
- Use soft string lights for warmth
- Avoid harsh overhead lights that cast shadows
If you’re adding lights, weave them behind fabric or balloons so they glow rather than glare.
Finish With Small Styling Details
The final touches are what make a DIY backdrop feel styled instead of homemade.
Quick upgrades:
- Add greenery or faux florals
- Place a small rug or stool in front of the backdrop
- Match props to your color palette
- Keep the area around the backdrop clutter-free
Take a few test photos before the party starts. Adjust spacing, lighting, or height as needed—it’s much easier to fix before guests arrive.
Final Takeaway
DIY birthday backdrops don’t need to be complicated or expensive to look amazing. With a clear theme, a few key materials, and thoughtful styling, you can create a photo setup that turns simple moments into lasting memories.
Save this guide for your next celebration and start planning a backdrop that deserves a spot on your camera roll—and your Pinterest board.

Leave a Reply