

If you want your home to look magical from the street this holiday season, glowing Christmas window silhouettes are one of the easiest—and most eye-catching—projects you can make. They create that warm, storybook look that makes people stop and stare. Best of all, you can customize them to match any holiday theme.
In this guide, you’ll learn how to design, cut, and light up your own silhouettes using budget-friendly materials you may already have at home. Let’s turn those windows into a festive highlight!
What You Need Before You Start
You don’t need fancy tools. Most supplies are inexpensive, easy to find, and perfect for beginners.
Basic Materials:
- Black cardstock or matte black poster board
- Scissors or a craft knife
- Painter’s tape or clear double-sided tape
- LED string lights or battery-powered LEDs
- Tracing paper or parchment paper (for diffused glow)
- Printable silhouette templates (optional)
Nice-to-Have Extras:
- Glitter paper for subtle sparkle
- Window-safe suction hooks
- White chalk or a silver pen for tracing

These simple tools are all you need to create silhouettes that look professionally made from outside.
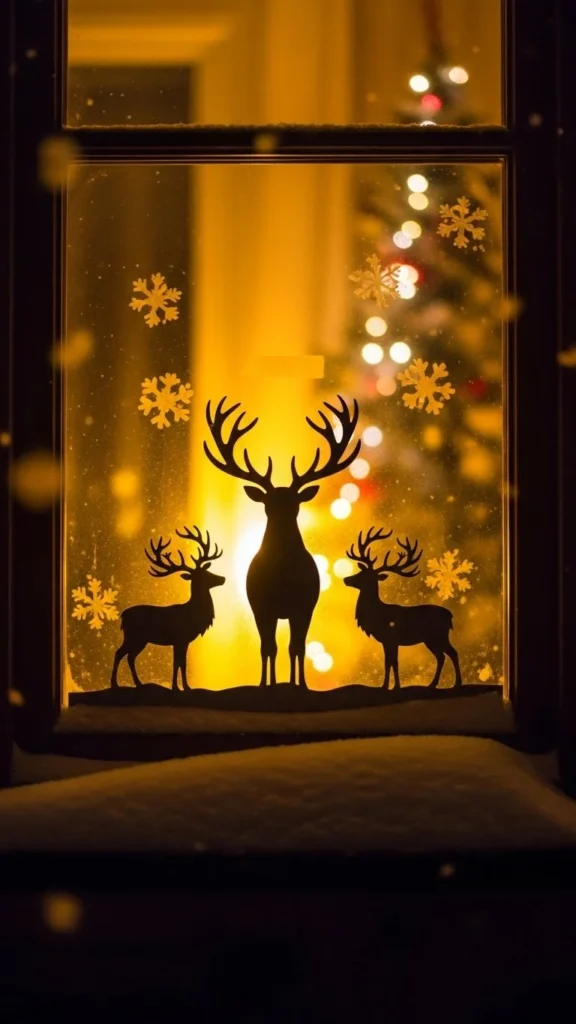
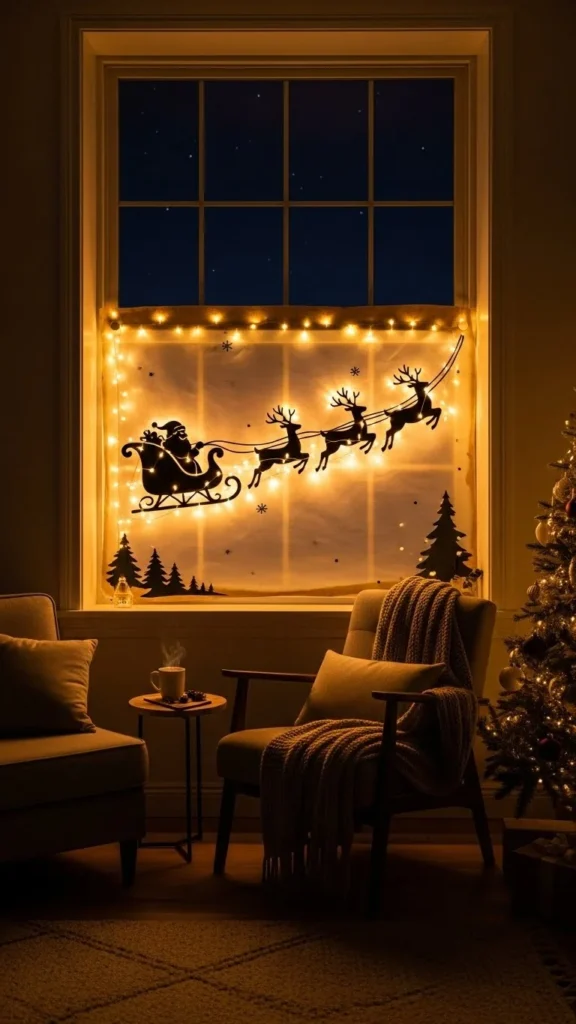
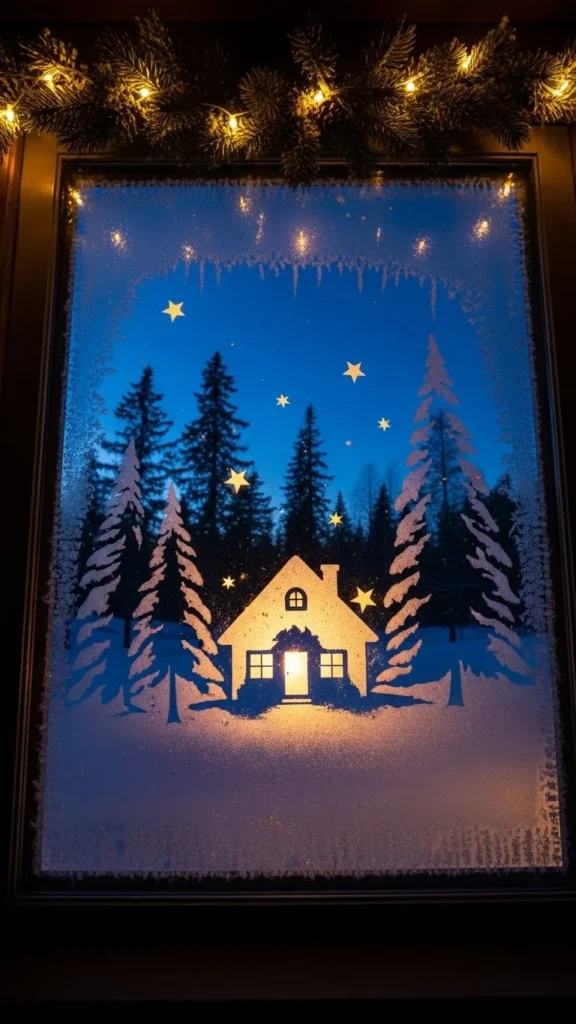
Choose Your Christmas Window Silhouette Design
Before cutting anything, decide on a theme. The design determines how easy the project will be and how bold your window looks.
Popular beginner-friendly ideas include:
- Reindeer standing in a snowy forest
- Santa and his sleigh flying across the sky
- Cozy winter cottages with glowing windows
- Snowflakes of different sizes
- Angels, stars, or Christmas trees
If you’re unsure where to start, print a silhouette template online. You can scale it up using a photocopier or print multiple sheets and tape them together.
Tips for choosing the right design:
- Large shapes glow better from the street.
- Avoid tiny details if you’re new to cutting.
- Remember your window size, so your art fills the space nicely.
Cut, Trace, and Assemble Your Silhouettes
This is where the magic starts! You’ll turn your designs into crisp black shapes that pop beautifully once backlit.
Step-by-Step Cutting Instructions
- Place your printed template on top of the black cardstock.
- Use tape to keep it steady.
- Gently cut around the lines with scissors or a precision craft knife.
- Remove the cutout pieces carefully so the silhouette stays smooth.
If you’re creating a layered silhouette—like trees in front and stars behind—cut each layer separately.
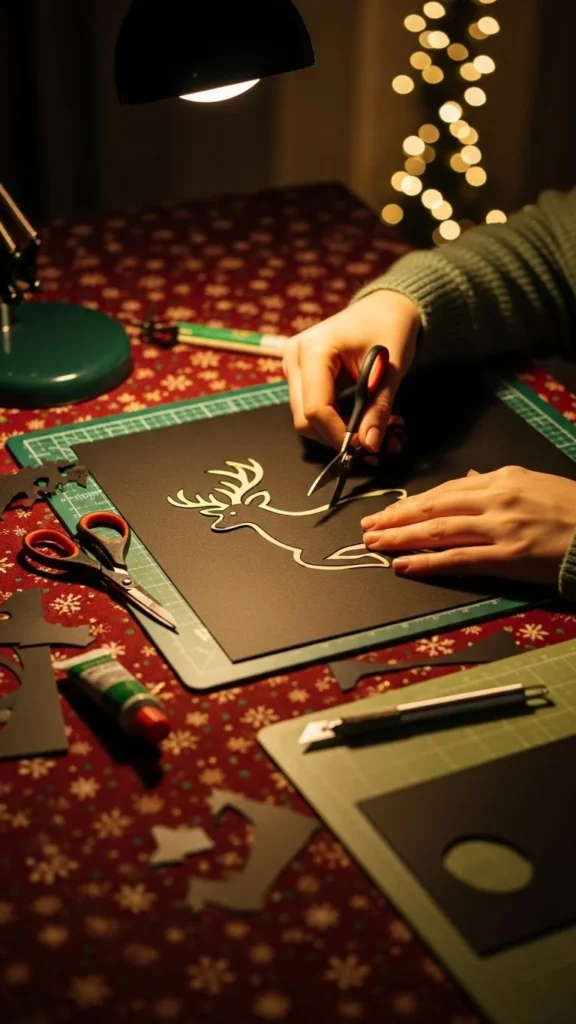
Helpful Tips
- Use slow, steady cuts to keep edges clean.
- For small curves, rotate the paper instead of your scissors.
- Save leftover scraps for tiny stars or snowflakes.
Once everything is cut, you’re ready to assemble your glowing scene.
Add the Glow: Lighting Your Window Silhouettes
Lighting is what transforms your cutouts into glowing artwork. The trick is to create soft, even backlight.
Method 1: Behind-the-Silhouette LED Strings
This is the easiest and most effective method.
- Tape your silhouette to the inside of your window using painter’s tape.
- Tape a sheet of parchment paper behind it.
- Lay LED string lights behind the parchment, spreading them evenly.
- Secure the lights with small tape sections or suction hooks.
This creates a warm, diffused glow without any harsh light dots.
Method 2: LED Panels or Battery Lights
If you prefer a cleaner look, place a small LED panel behind the parchment. Even a battery puck light will work—just make sure it doesn’t show through the paper.
Lighting Tips
- Choose warm white LEDs for a cozy holiday feel.
- Keep wires neat by taping them along window edges.
- Test the glow at night before finalizing placement.
Install Your Window Silhouettes for Maximum Impact
Once everything is ready, it’s time to bring your window to life.
Step-by-Step Installation
- Clean the window glass so tape sticks better.
- Gently press the silhouette against the glass.
- Smooth out any wrinkles in the parchment behind it.
- Turn on the lights and adjust as needed.
For large windows, you can combine multiple silhouettes to create a full winter landscape.
Ways to Style Your Window Display
- Add string lights around the window frame.
- Create a layered look with stars or snowflakes placed separately.
- Add faux snow on the sill for extra charm.
Your glowing silhouette should now look stunning from the street!
Troubleshooting Common Issues
Even simple crafts can have hiccups. Here’s how to fix common problems:
- Silhouette edges look uneven: Trim them gently with scissors.
- Lights look too bright: Add another layer of parchment to soften the glow.
- Tape keeps peeling: Switch to painter’s tape or use suction hooks.
- Design looks flat: Add a second silhouette layer slightly offset for depth.
These quick fixes ensure your display looks polished and professional.
Final Touches to Make It Truly Magical
You can decorate around your silhouette to make it feel even more festive:
- Place a small wreath nearby.
- Add window-safe decals for extra sparkle.
- Use LED candles on the window sill to create a warm vignette.
Bring the Glow to Your Holiday Season
DIY Christmas window silhouettes are simple, fun, and incredibly rewarding. With just cardstock, lights, and a little creativity, you can turn any window into a glowing holiday scene that spreads joy to neighbors and passersby.
Ready to try it? Save this idea for later and start crafting your own magical window glow tonight!

Leave a Reply