

Cake toppers are the finishing touch that can turn a simple cake into something extraordinary. Whether you’re celebrating a birthday, wedding, or any special occasion, a beautifully designed topper adds flair and elegance to your creation. But how do you make cake toppers that look like they belong in a professional bakery? Don’t worry! With a few tips and tricks, you’ll be able to craft cake toppers that will impress anyone. Let’s dive into the process!
Gather Your Materials
Before you can start creating your cake topper, you need to gather all the necessary materials. The type of topper you’re making will determine the tools you need, but here are some basic supplies that work for most designs:
- Fondant or gum paste (for sculpted designs)
- Edible markers (for intricate details)
- Sugar flowers or decorative sprinkles
- Toothpicks, bamboo skewers, or candy sticks (for supporting toppers)
- Piping gel or royal icing (for sticking decorations in place)
- Food-safe paintbrushes (for applying edible colors or dust)
- Decorative elements like glitter, pearls, or tiny figurines
Having everything ready will make the process smooth and more enjoyable!
Choose Your Design
The key to a professional-looking cake topper is choosing a design that complements the theme of the event. Here are some popular and easy-to-make ideas that can look stunning:
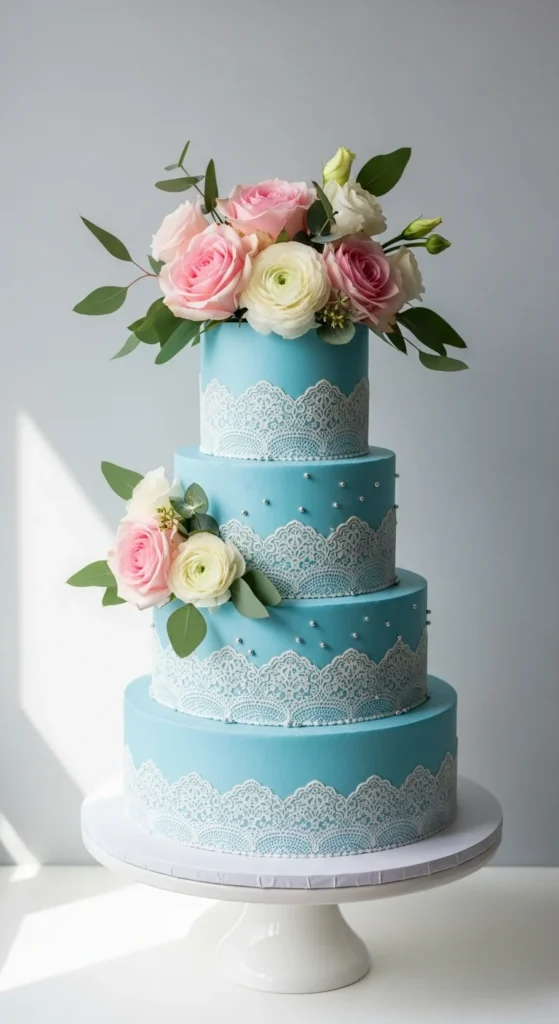
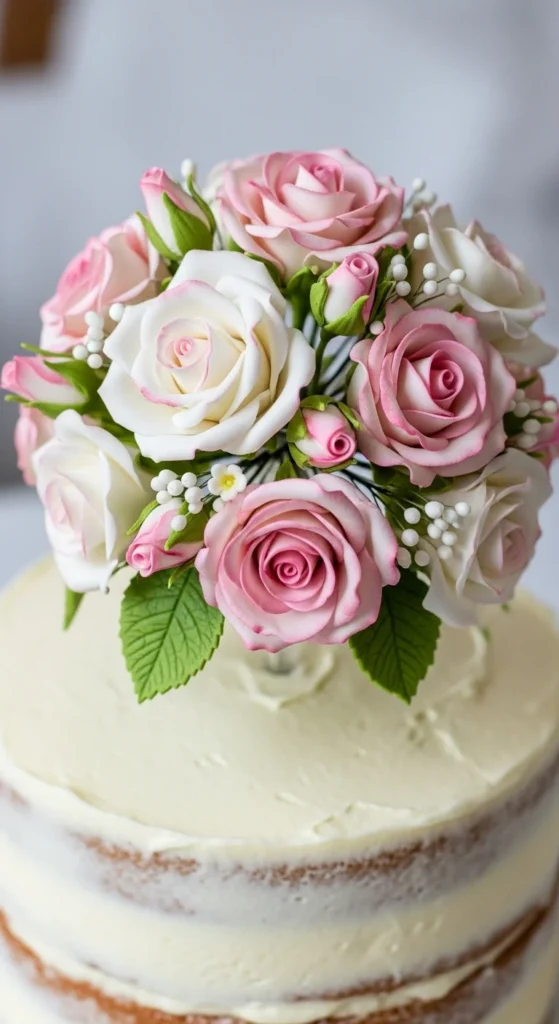
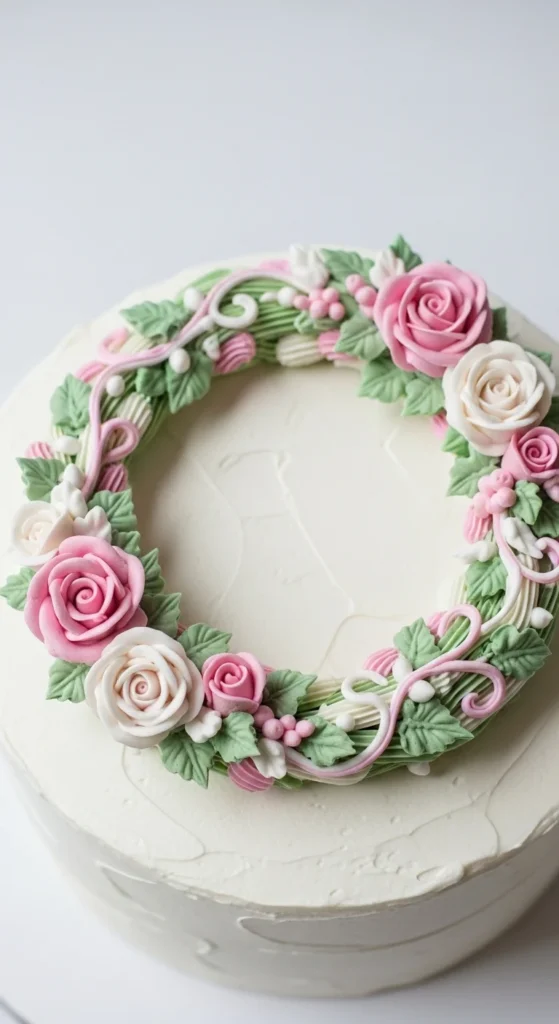
1. Floral Cake Toppers
Flowers are timeless and versatile. You can use fondant or gum paste to create delicate roses, peonies, or even wildflowers. These can be molded by hand or shaped with cutters for consistency.
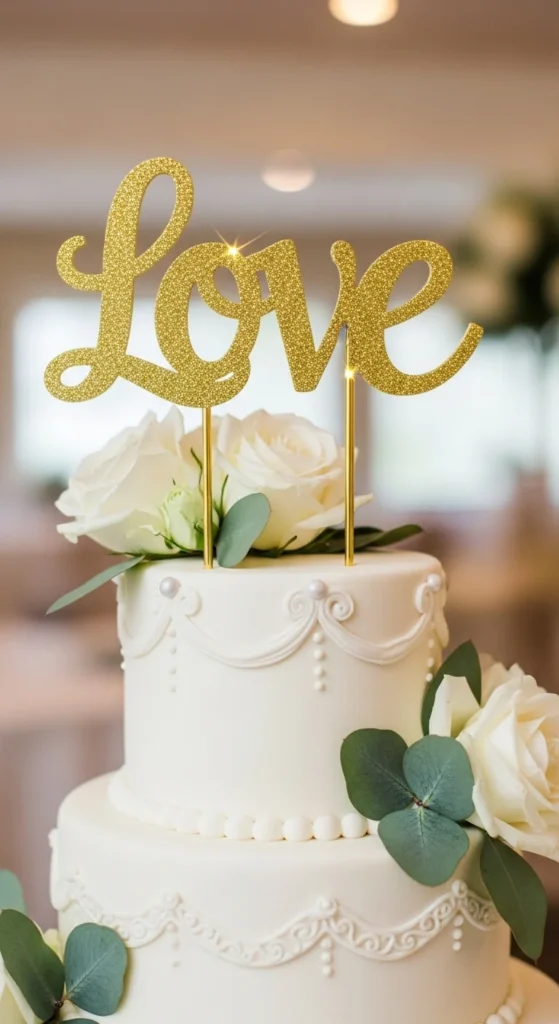
2. Lettering or Monograms
Personalized cake toppers with initials or a name add a special touch. Using fondant or a pre-made monogram topper gives your cake a sleek and refined look.
3. Themed Cake Toppers
For events like birthdays or weddings, a themed topper (e.g., a crown for a princess theme or a wedding couple figurine) can bring everything together beautifully.
Crafting Your Cake Topper
Once you’ve decided on your design, it’s time to get crafting! Here’s a simple guide to creating a professional-looking topper from start to finish:
Step 1: Prepare Your Base
Start with a sturdy base for your topper. If you’re using fondant or gum paste, roll it out to the desired thickness. You can use a template or freehand the design, depending on your preference. If you’re making flowers, create each petal shape individually and leave them to dry slightly before assembling.
Step 2: Add Details
This is where you can get creative! If you’re making flowers, add small details like veins on petals using a fondant tool or a veining mat. For themed toppers, like a monogram or a shaped figure, focus on creating clean, sharp edges. The more attention to detail, the more polished your topper will look.
Step 3: Assemble
Once you’ve created individual elements of the topper, it’s time to assemble them. Use edible glue, royal icing, or piping gel to attach each part carefully. Don’t rush this step — ensure everything is aligned and proportionate for that professional finish.
Step 4: Drying and Storing
Let your topper dry completely. This is especially important if you’ve used fondant or gum paste, as they need time to harden. Store the topper in a dry, cool place, away from humidity, to prevent it from becoming too soft or sticky.
Secure Your Cake Topper
When you’re ready to place the topper on the cake, ensure it is securely supported. Use toothpicks, bamboo skewers, or cake dowels to attach the topper to the cake. These should be hidden from view but sturdy enough to hold the topper in place. If you’re using a heavy topper, like a figurine, double-check that the base of the cake is strong enough to support it.
For extra precision, use a little piping gel or royal icing to help the topper adhere to the cake’s surface. This will also prevent it from sliding around if you need to transport the cake.
Add Final Touches
Now that your topper is securely in place, it’s time to add some flair! Consider using edible glitter, small sugar pearls, or even tiny hand-painted details to give your topper a glamorous, professional touch. Lightly dusting the topper with edible shimmer spray can also enhance its visual appeal, adding an elegant finish to your design.
Conclusion: Perfecting Your Cake Toppers
Making a cake topper that looks professional is all about attention to detail, patience, and creativity. Start with the right materials, choose a design that fits the occasion, and take your time to craft each element carefully. By following these simple steps, you can create a stunning topper that elevates your cake and leaves a lasting impression.
Save this guide for your next celebration and start making your own beautiful, professional cake toppers!

Leave a Reply