

There’s something magical about a donut wall. It’s playful. It’s interactive. And yes—it instantly turns any party corner into an Instagram hotspot. Whether you’re planning a birthday, baby shower, bridal shower, or backyard celebration, a donut wall adds that “wow” factor without blowing your budget.
The best part? You don’t need fancy tools or professional skills. With a little planning and a few supplies, you can build a donut wall that looks straight out of Pinterest.
Why Donut Walls Are a Party Favorite
Donut walls work because they’re both décor and dessert. Guests don’t just look at them—they interact with them. Plus, they photograph beautifully from every angle.
Here’s why hosts love them:
- Easy to customize for any theme
- Works for indoor or outdoor parties
- Budget-friendly compared to large dessert tables
- Encourages guests to mingle and grab their own treat
Once you build one, you’ll want to reuse it again and again.
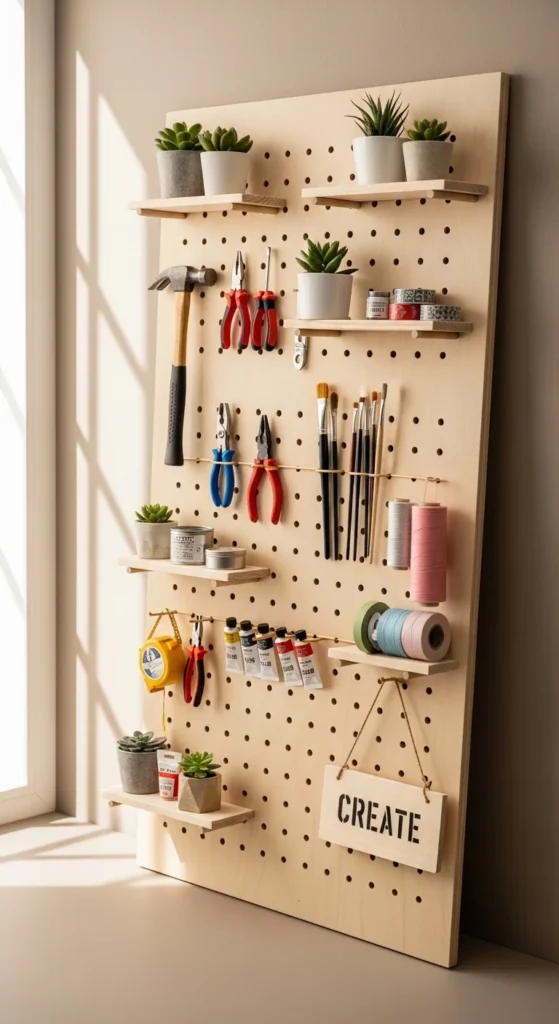
Choosing the Right Base for Your Donut Wall
Before grabbing donuts, you need a sturdy base. The structure matters more than anything else.
Popular donut wall base options:
- Plywood board (most durable and reusable)
- Foam board (lightweight for small parties)
- Pegboard (perfect for evenly spaced donuts)
For most DIYers, pegboard is the easiest option. It already has holes spaced evenly, which makes donut placement simple and clean.
Tip: Aim for a board size between 24×36 inches and 30×40 inches. This holds plenty of donuts without overwhelming the space.
Supplies You’ll Need (Simple and Affordable)
You don’t need a long shopping list. Keep it simple.
Basic supplies:
- Pegboard or plywood
- Wooden dowels or pegs
- Drill (if using plywood)
- Measuring tape
- Pencil
- Sandpaper
- Wall hooks or easel stand
Optional extras:
- Paint or wood stain
- Faux greenery or floral accents
- String lights (battery-powered)
Make sure pegs are food-safe or wrapped with parchment paper where donuts sit.
Step-by-Step: How to Build the Donut Wall
This is where the magic happens. Take your time, and measure carefully.
Step 1: Plan the layout
Lay your board flat and lightly mark where each donut will go. Space pegs about 4–5 inches apart so donuts don’t touch.
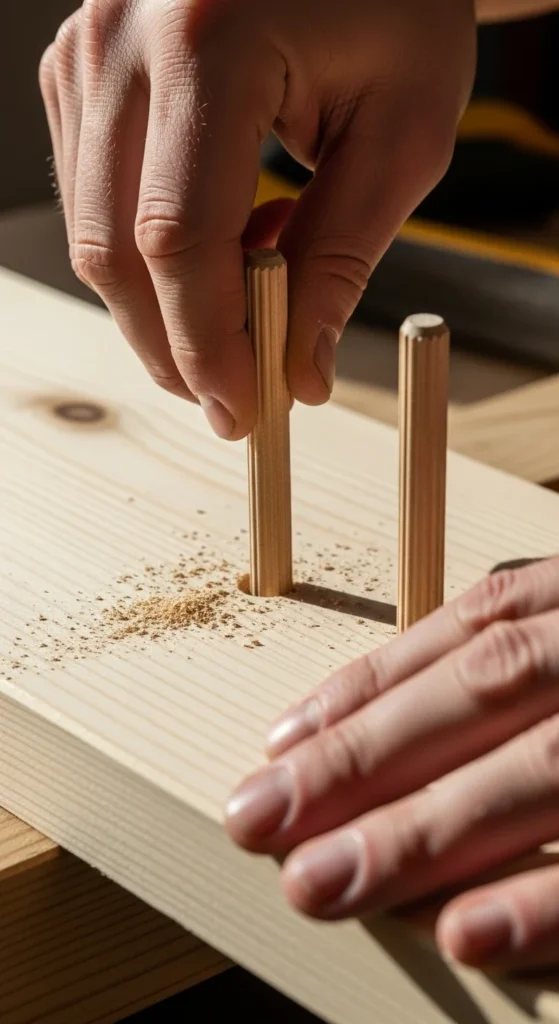
Step 2: Install the pegs
- For pegboard: Insert dowels directly into holes
- For plywood: Drill pilot holes, then insert dowels
Make sure each peg sticks out at least 3 inches.
Step 3: Smooth and clean
Sand rough edges and wipe the board clean. This keeps everything polished and photo-ready.
Step 4: Paint or finish (optional)
Neutral colors like white, beige, or natural wood photograph best. Let it fully dry before adding donuts.
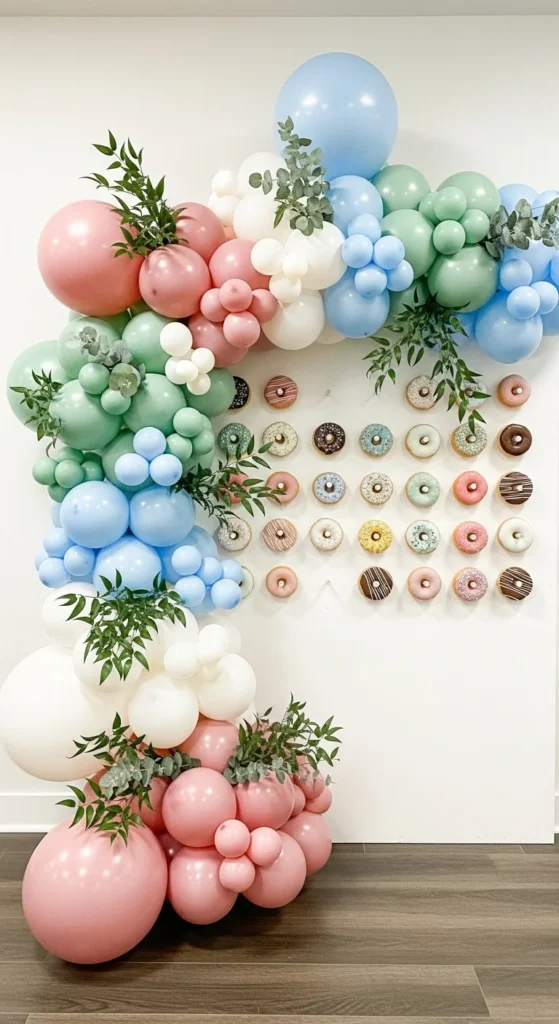
Decorating Your Donut Wall for Maximum Impact
This is where you match the wall to your party theme.
Easy decoration ideas:
- Faux greenery tucked into corners
- Balloon garlands framing the board
- Subtle fairy lights for evening events
- Matching donut colors to your party palette
Less is more. You want donuts to stay the star.
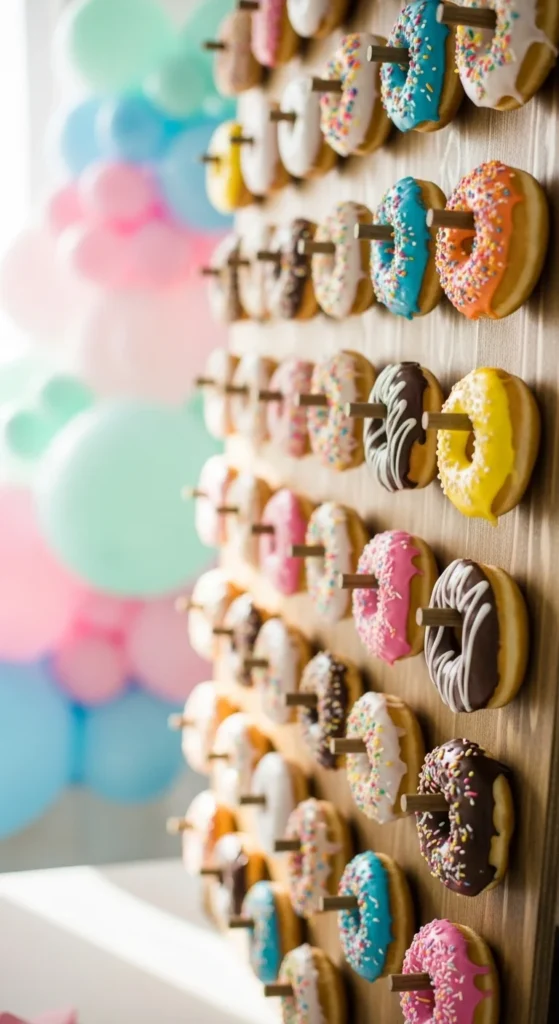
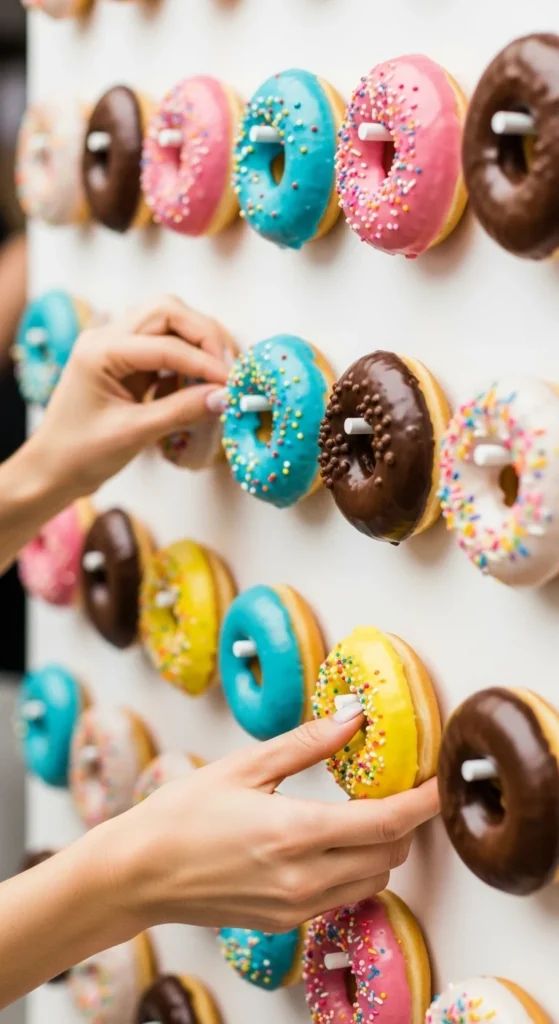
Donut Placement Tips That Look Amazing on Camera
How you place the donuts matters more than you think.
- Mix light and dark donut colors
- Alternate sprinkled and plain styles
- Keep spacing even for clean photos
- Add donuts just before guests arrive
Avoid stacking or overcrowding. A balanced layout always looks more professional.
Keeping Donuts Fresh and Party-Ready
Timing is everything.
Best practice:
- Build the wall earlier in the day
- Add donuts 30–60 minutes before guests arrive
- Keep the wall in a cool, shaded area
If your event lasts several hours, keep a small backup tray to refill empty spots.
Budget-Friendly and Reusable Ideas
Want to reuse your donut wall? You should.
- Store the board flat after the event
- Wrap pegs separately
- Change decorations for each occasion
The same wall can work for birthdays, baby showers, graduations, and seasonal parties—just switch the colors and accents.
Final Takeaway
A donut wall isn’t just a trend—it’s a fun, functional centerpiece that guests remember. With simple materials, a little creativity, and thoughtful styling, you can build one that looks high-end and totally Insta-worthy.
Save this guide for your next party, grab your tools, and get building. Your camera roll will thank you.

Leave a Reply